How to develop a product
Getting Started
A lot has to happen between conception and production, as no product springs into existence fully formed (and we would be out of a job if they did). While some designs are complex and tech-heavy and others exist only to be beautiful, the design process is essentially the same: building the visual language, ideation, refinement, CAD, prototyping, and factory prep. We use a step-by-step process with clear objectives and deliverables, which allows our clients to follow along and keeps everyone on track.
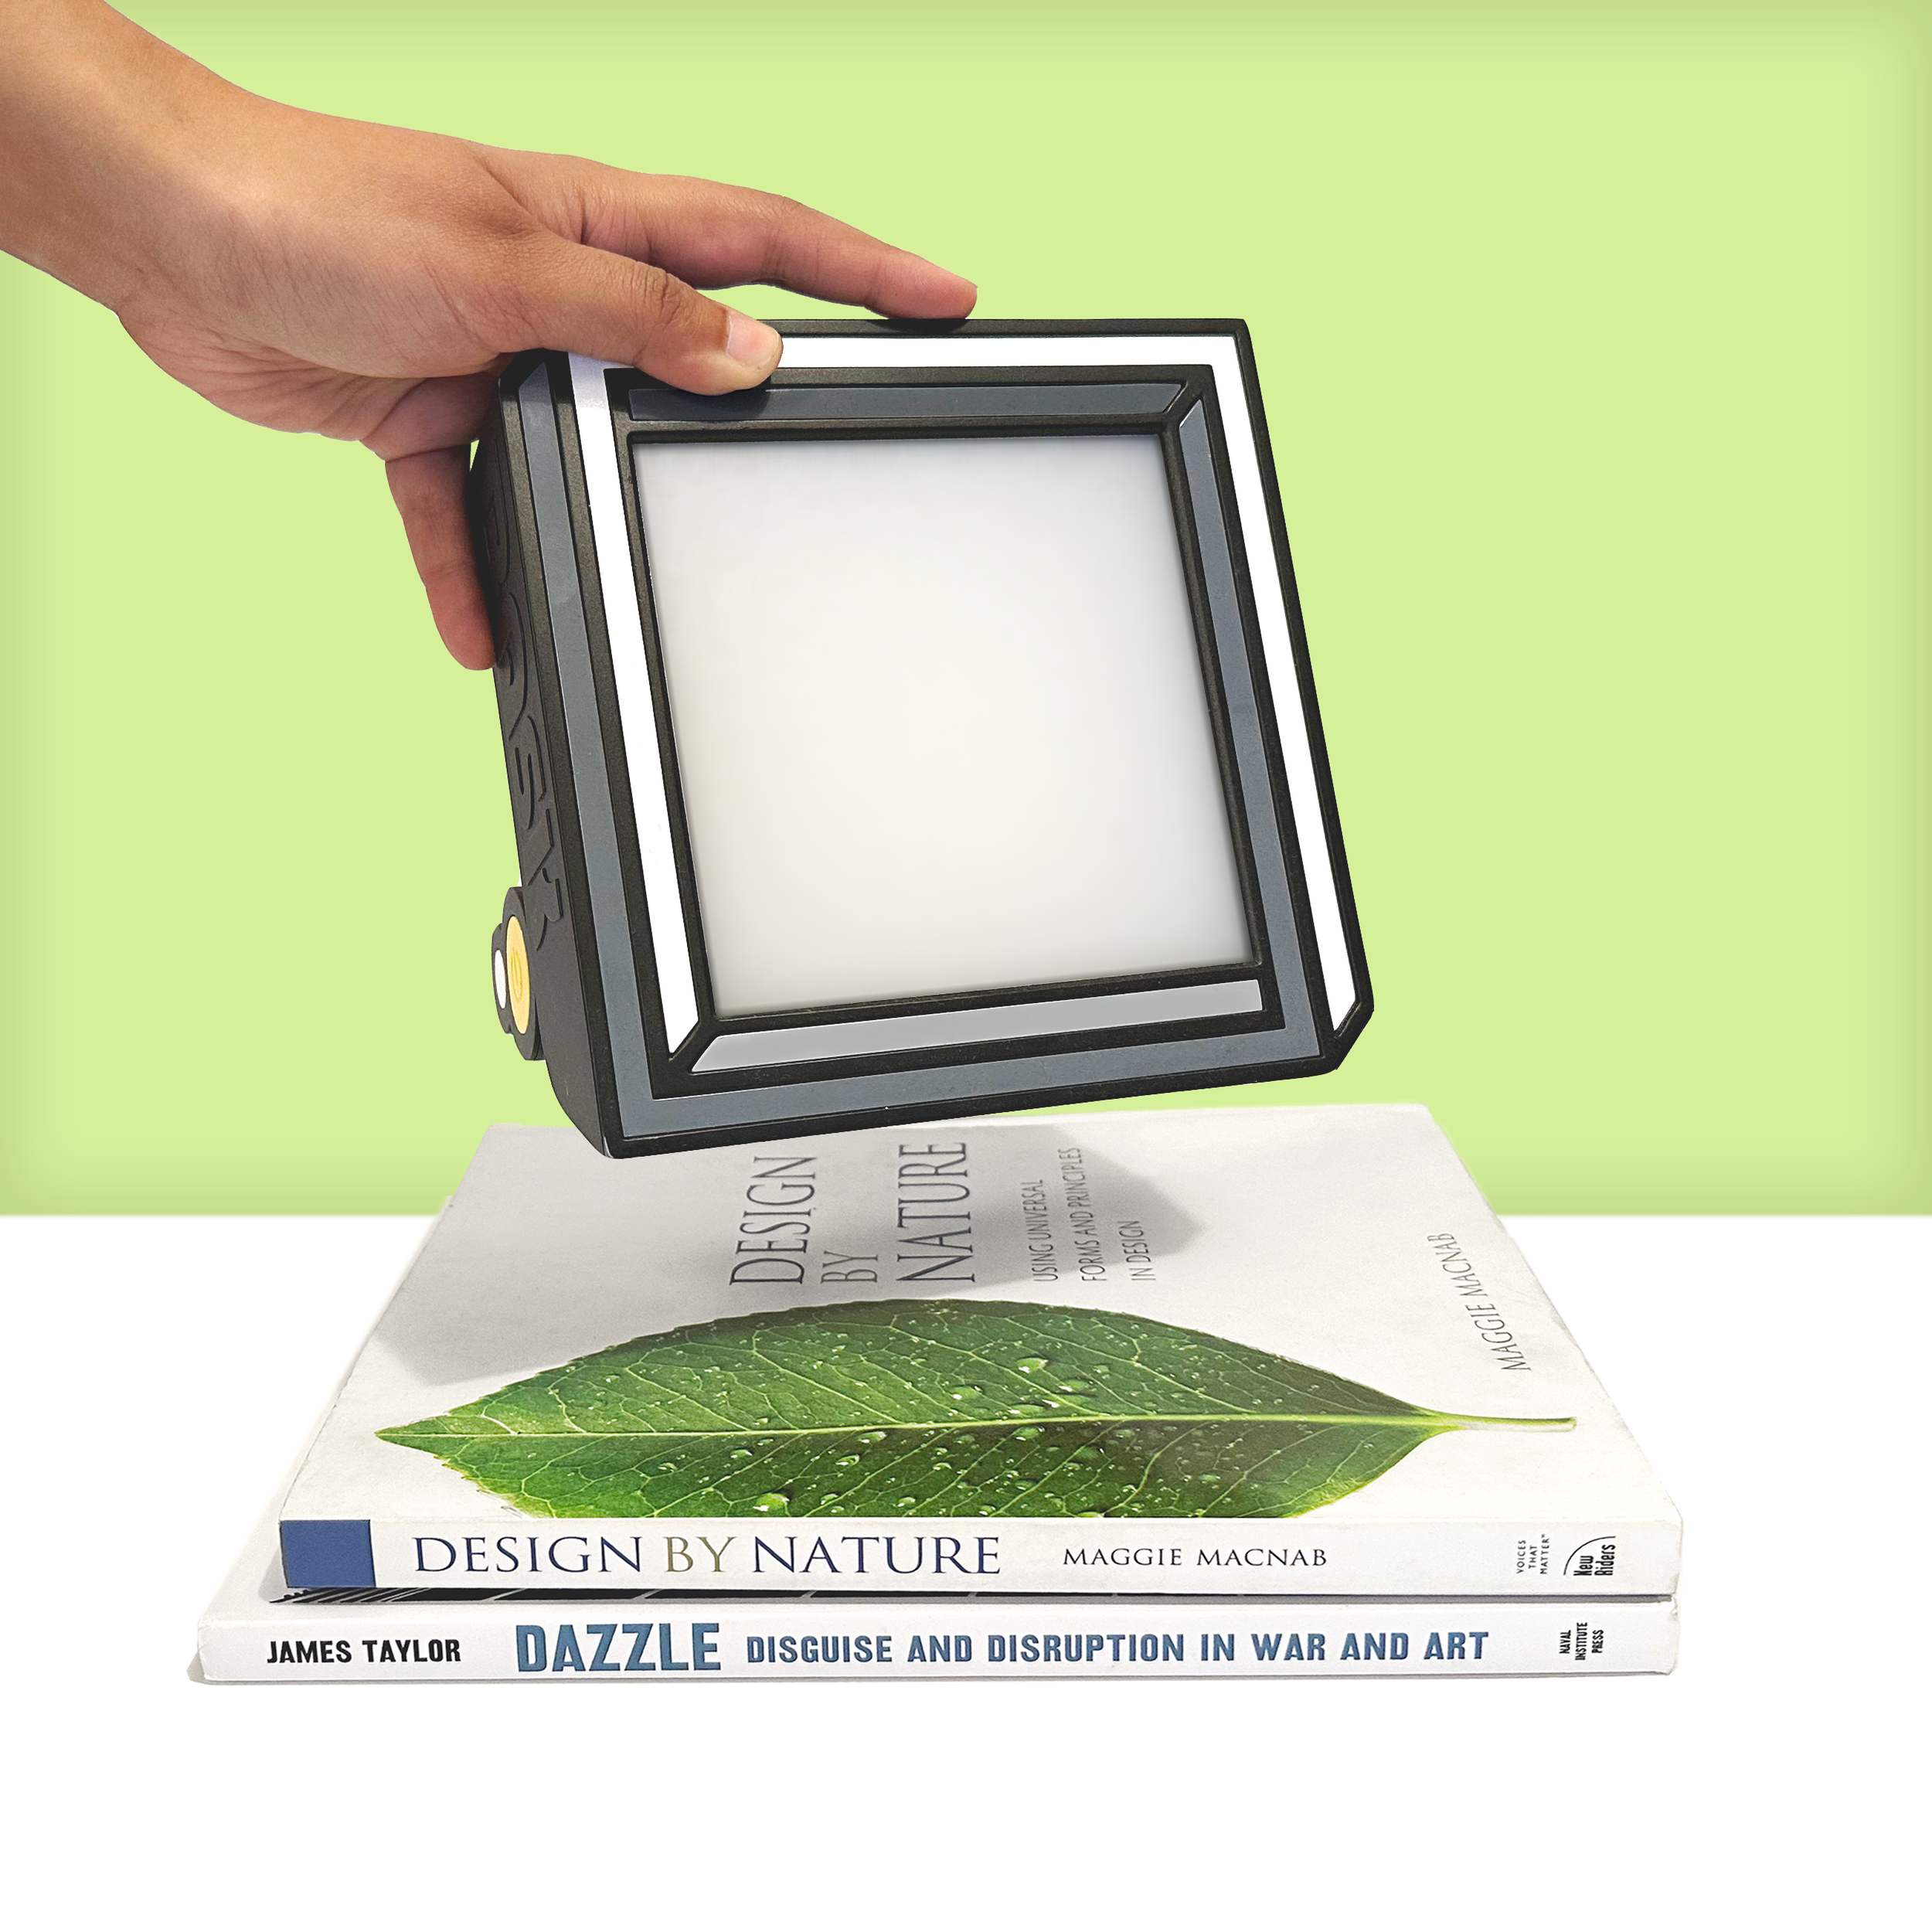
The following case study uses our Bask Lamp, which is both a technical lighting device and a décor piece. The client had already completed their market reseach, so we were able to jump right into the design.
WHAT’S THE BRIEF?
All projects start with a brief, or a document that outlines the core requirements for the product. These can be long and technical or short and pithy, but they need to be clear. Sometimes clients come with a brief fully prepared, sometimes we study the market and create one ourselves. This project only needed a short one:
Create eycatching sunlamps that function as statement décor and are unlike anything else on the market. They must produce 10,000 lumens (standard for therapy lamps), not overheat, throw light at a 45 degree angle, and be manufacturable for ~$10. They should be easily injection molded and compatible with OEM components. The plastic body must be fully recyclable.
Defining the brand
CREATING A BRAND OUTLINE
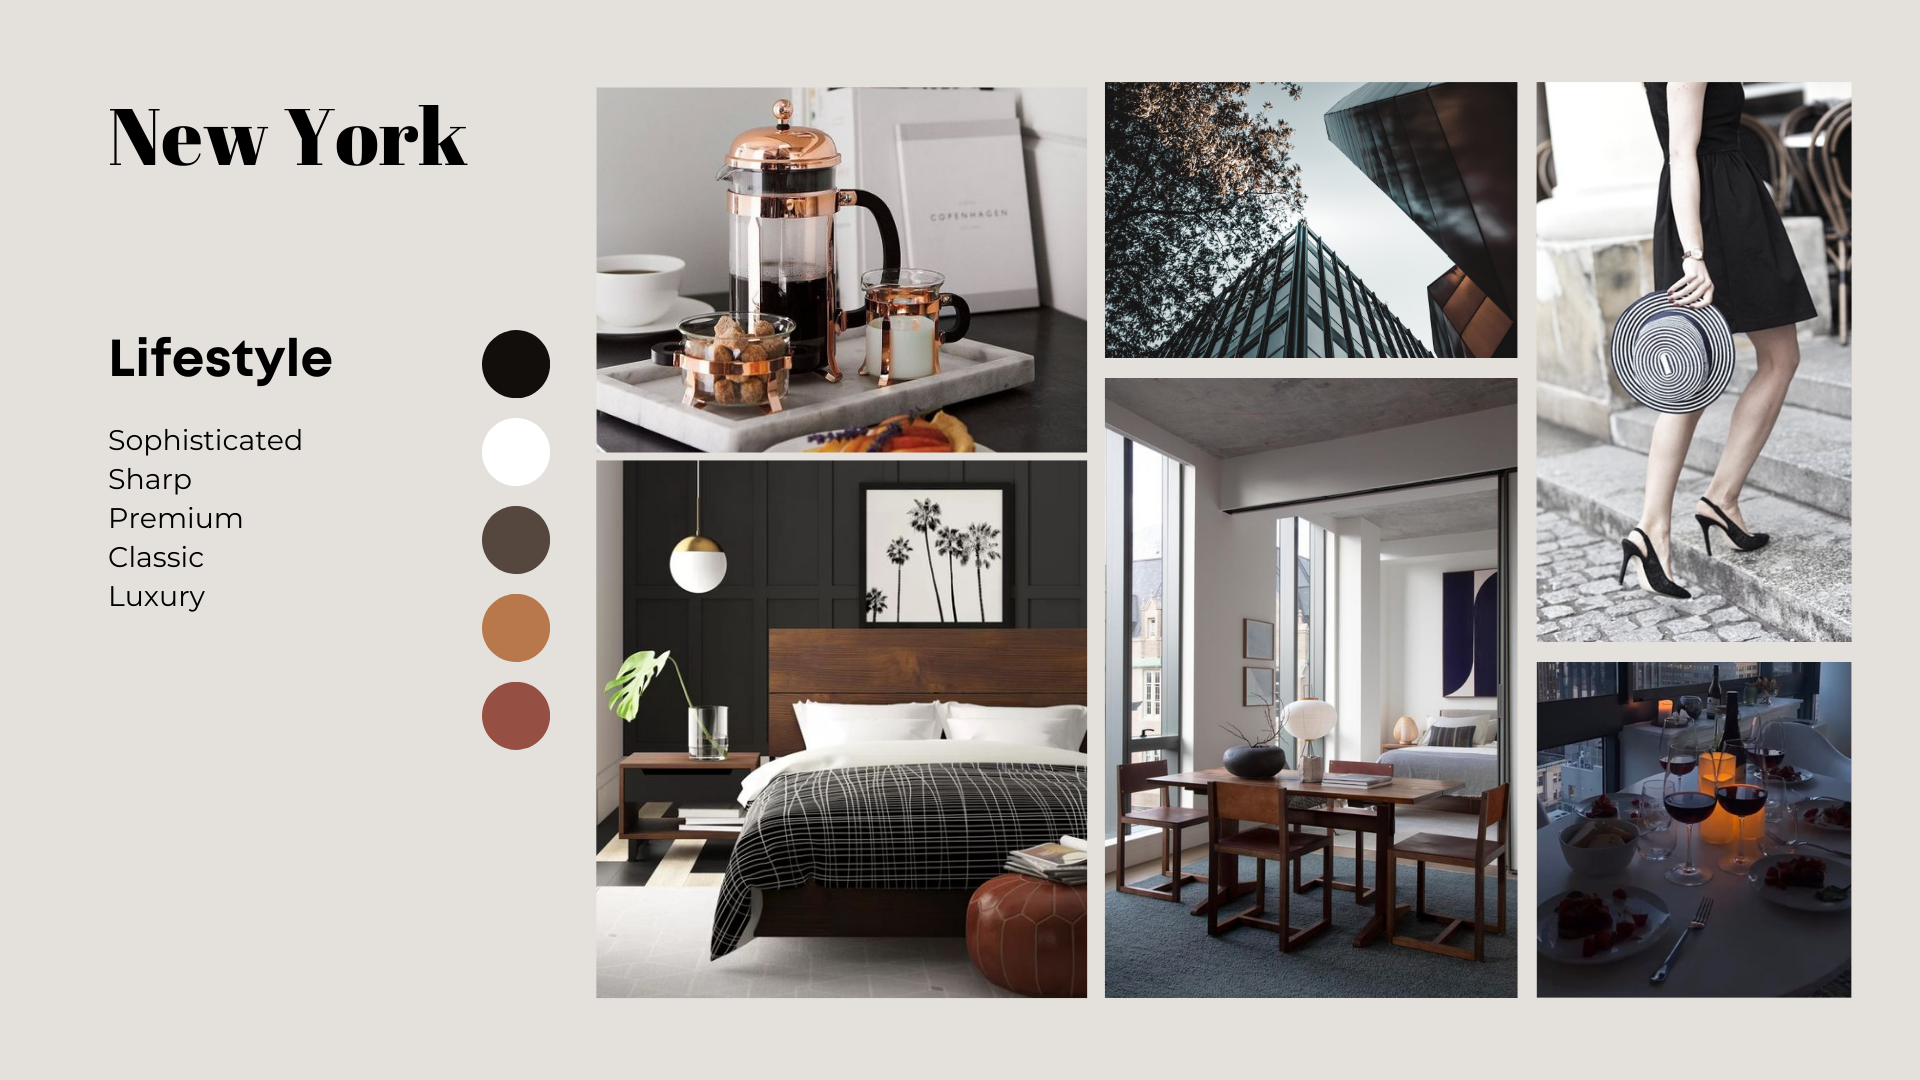
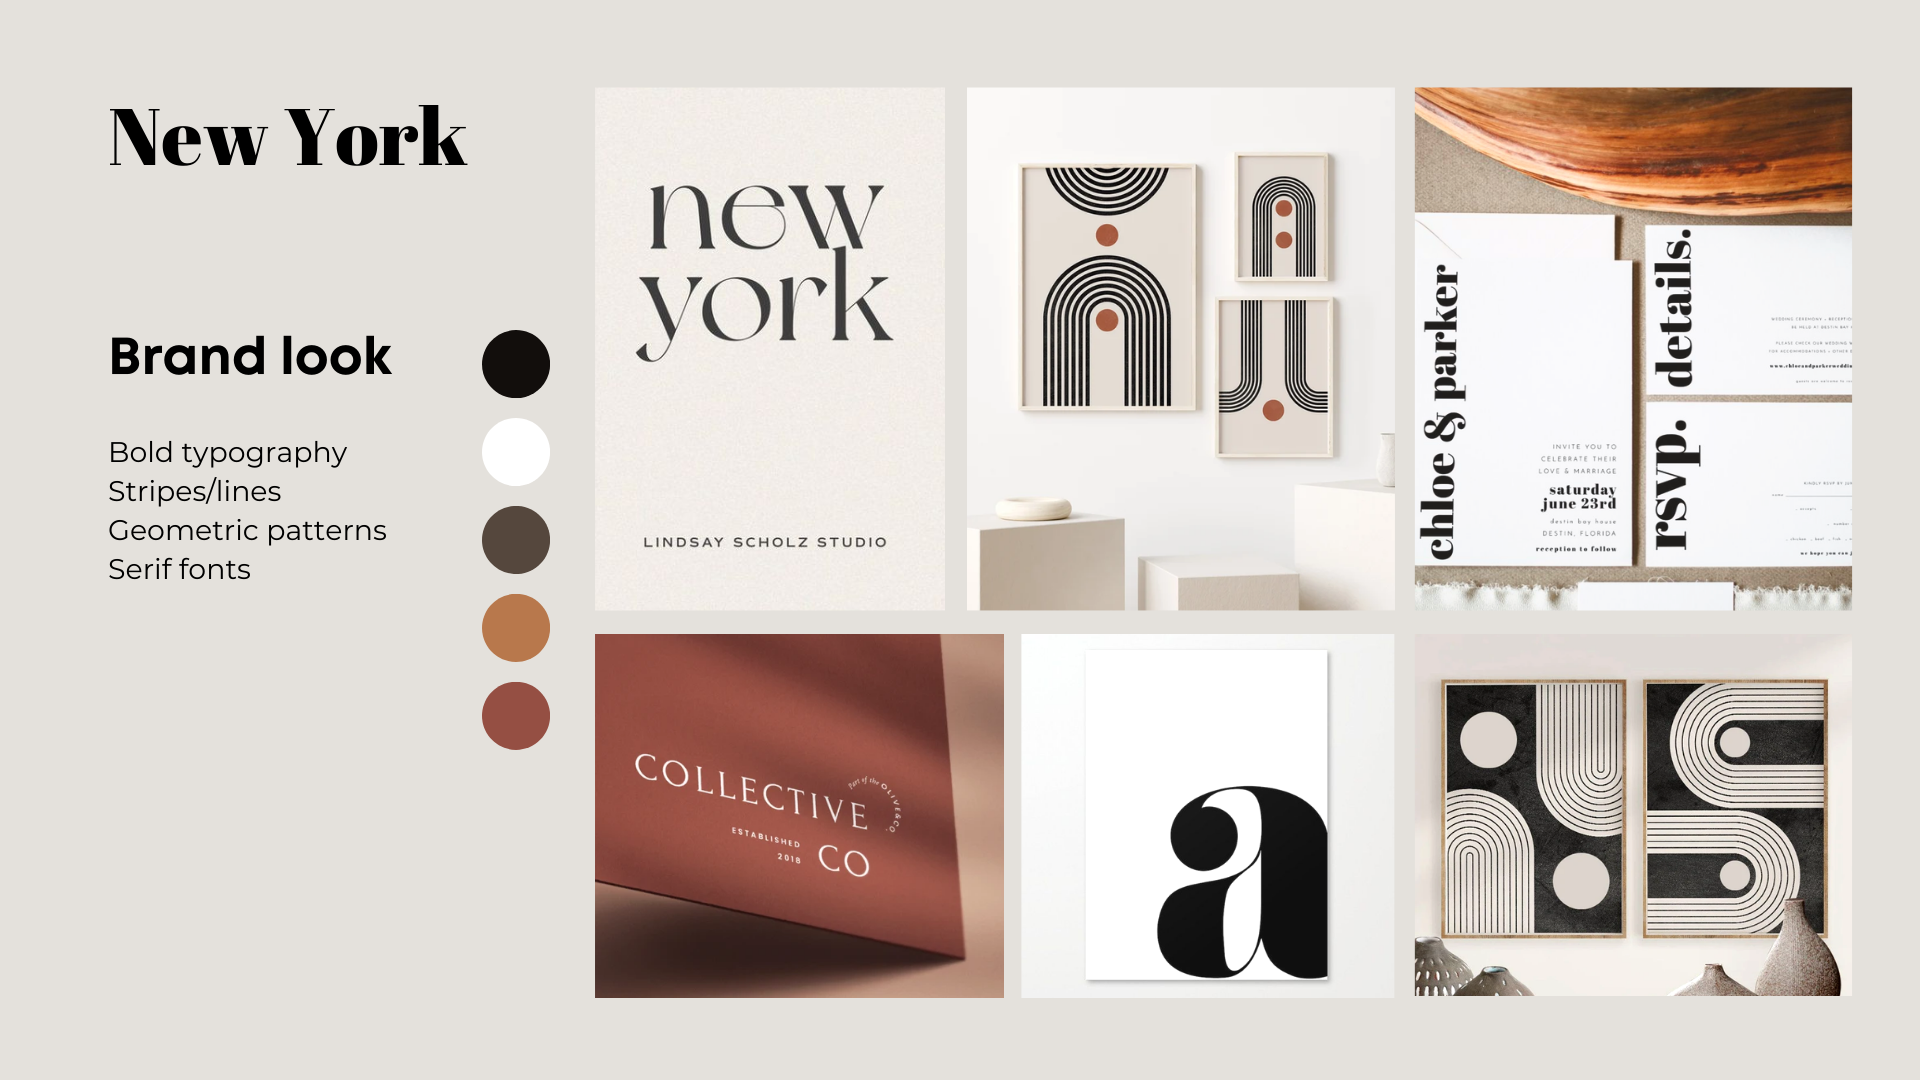
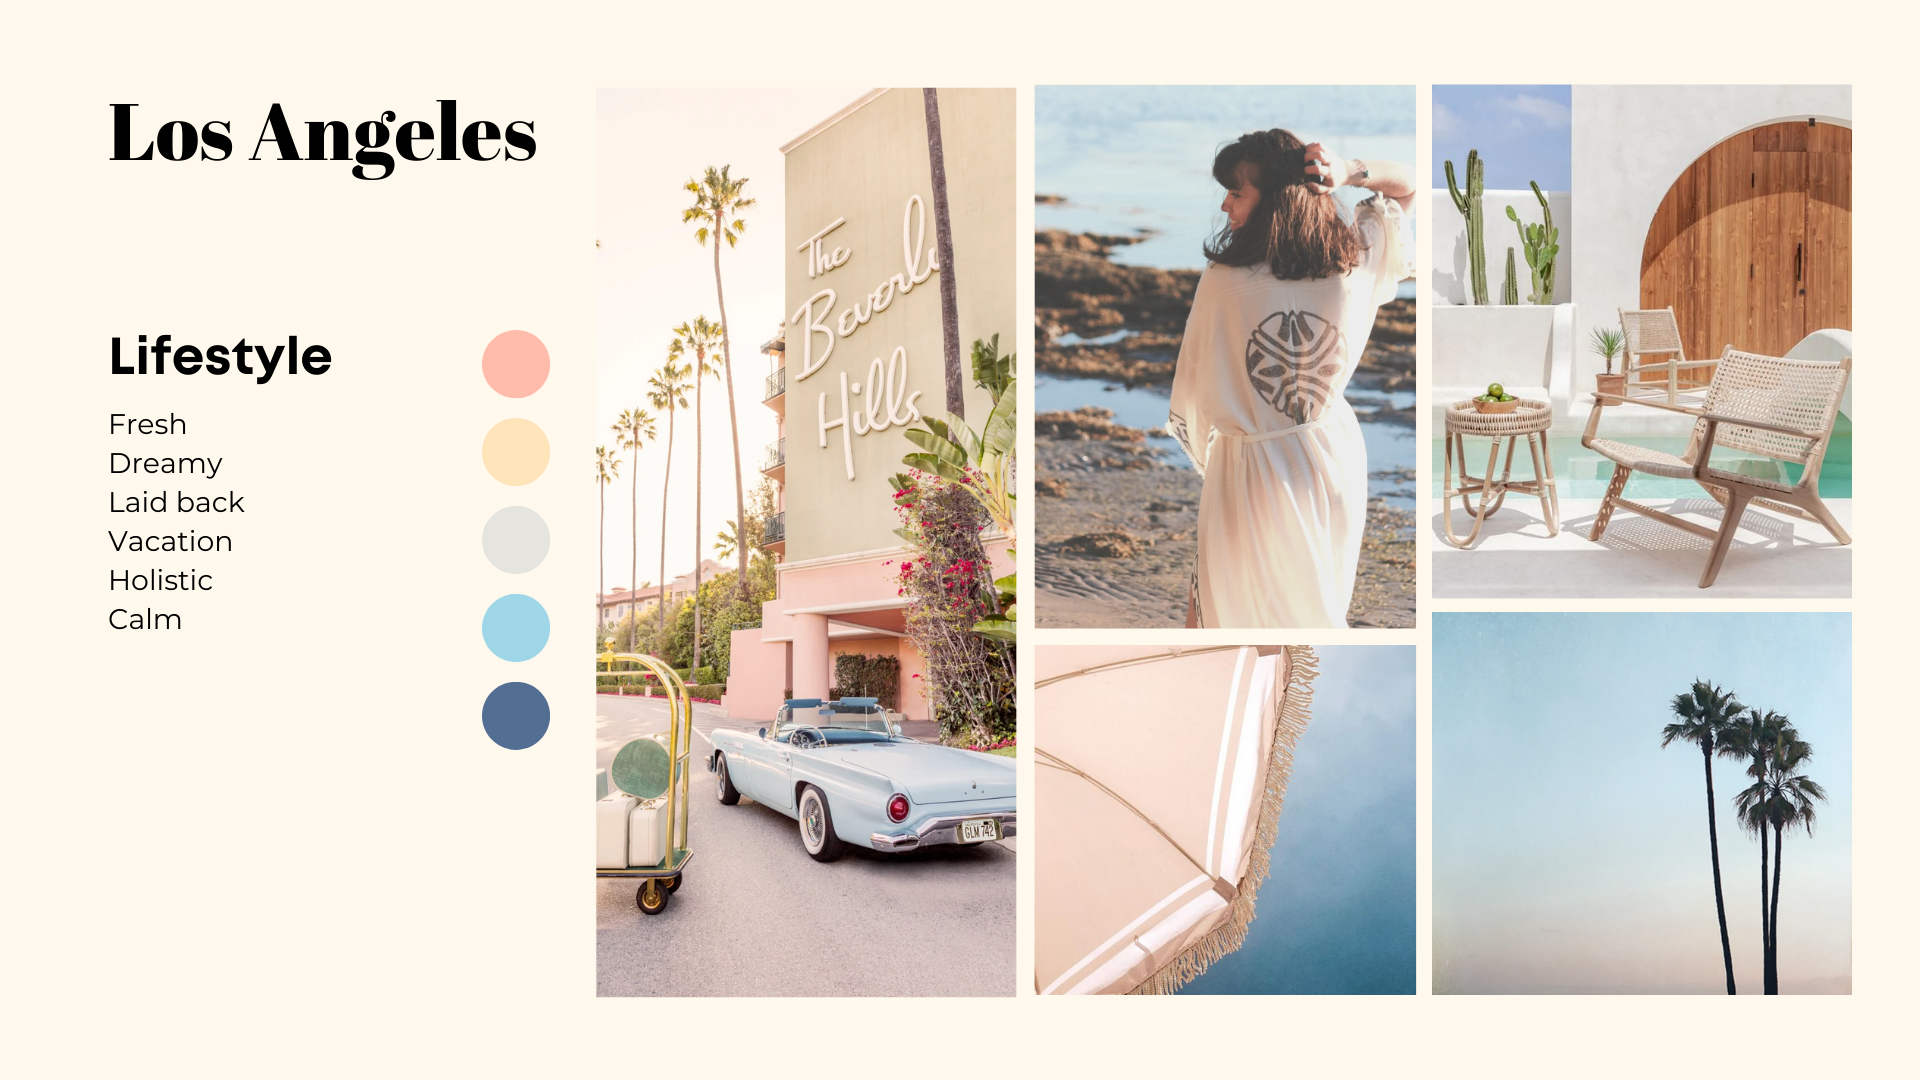
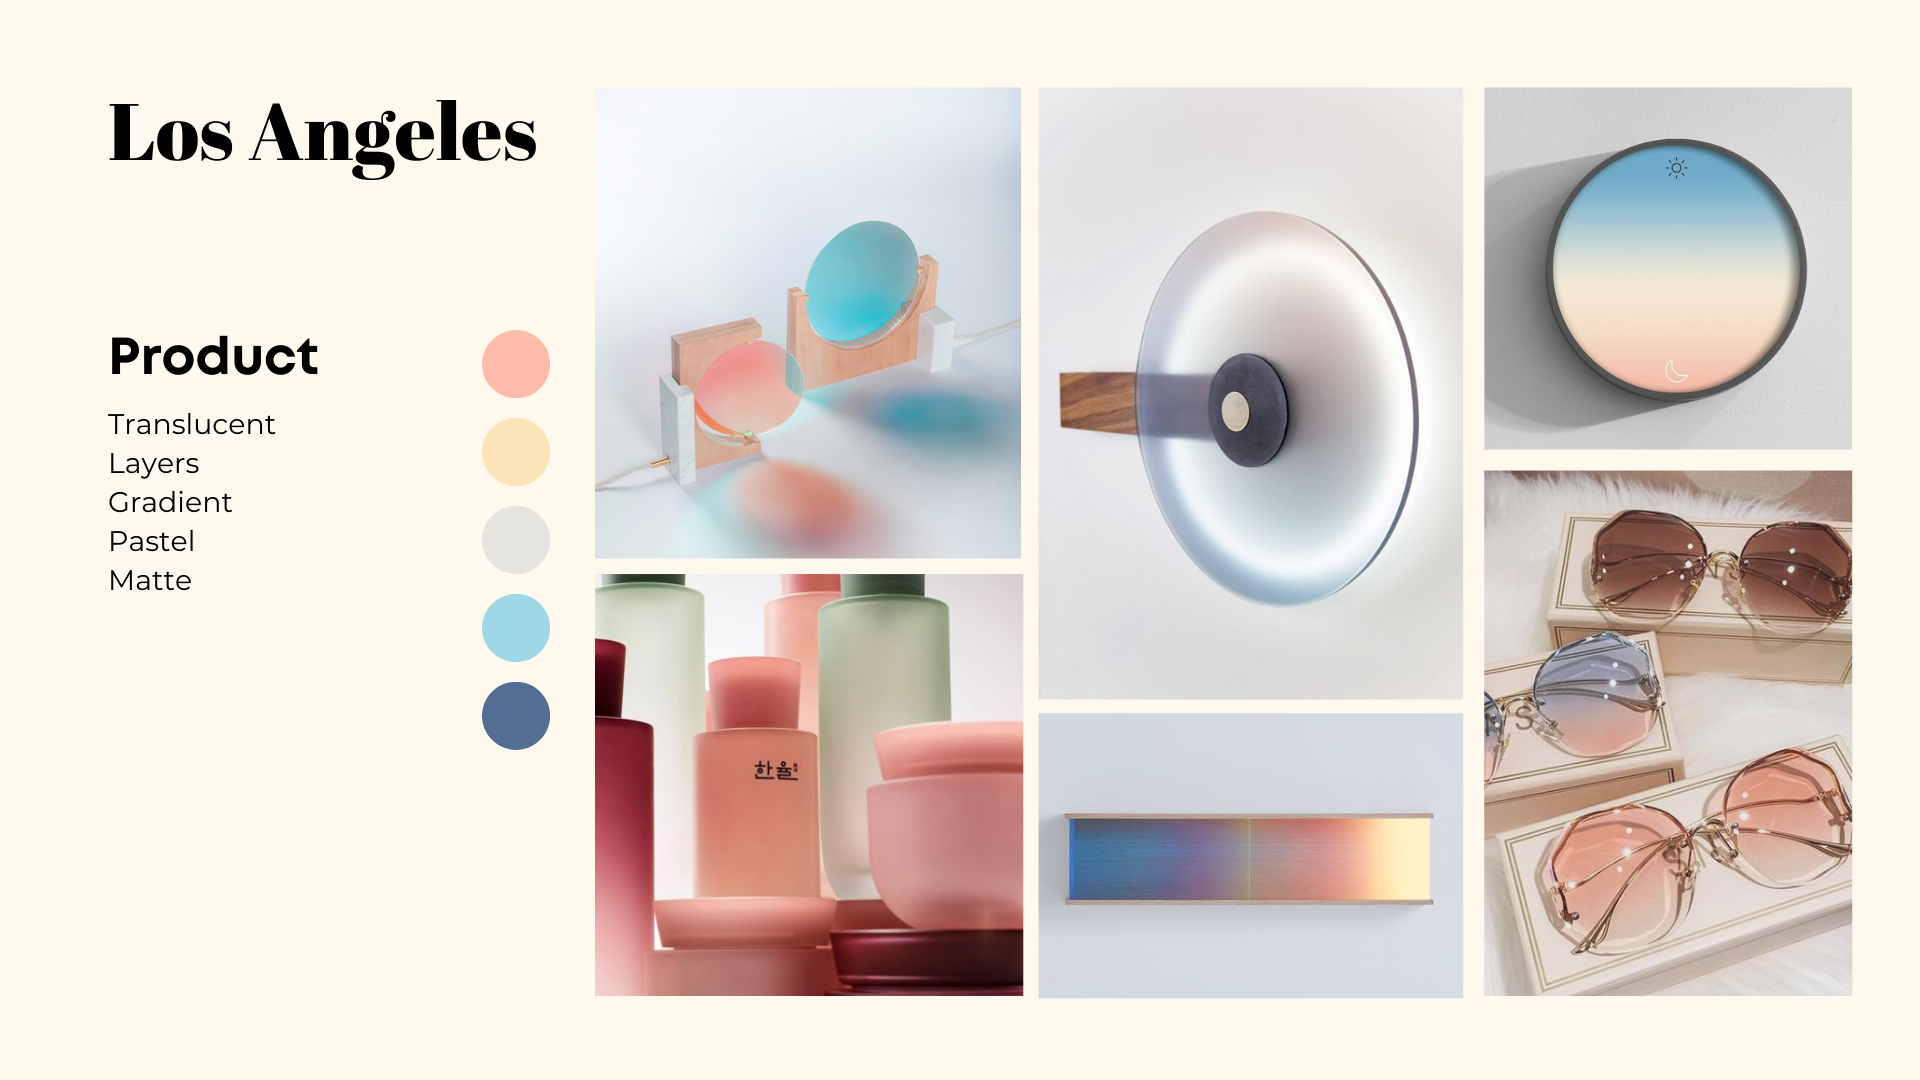
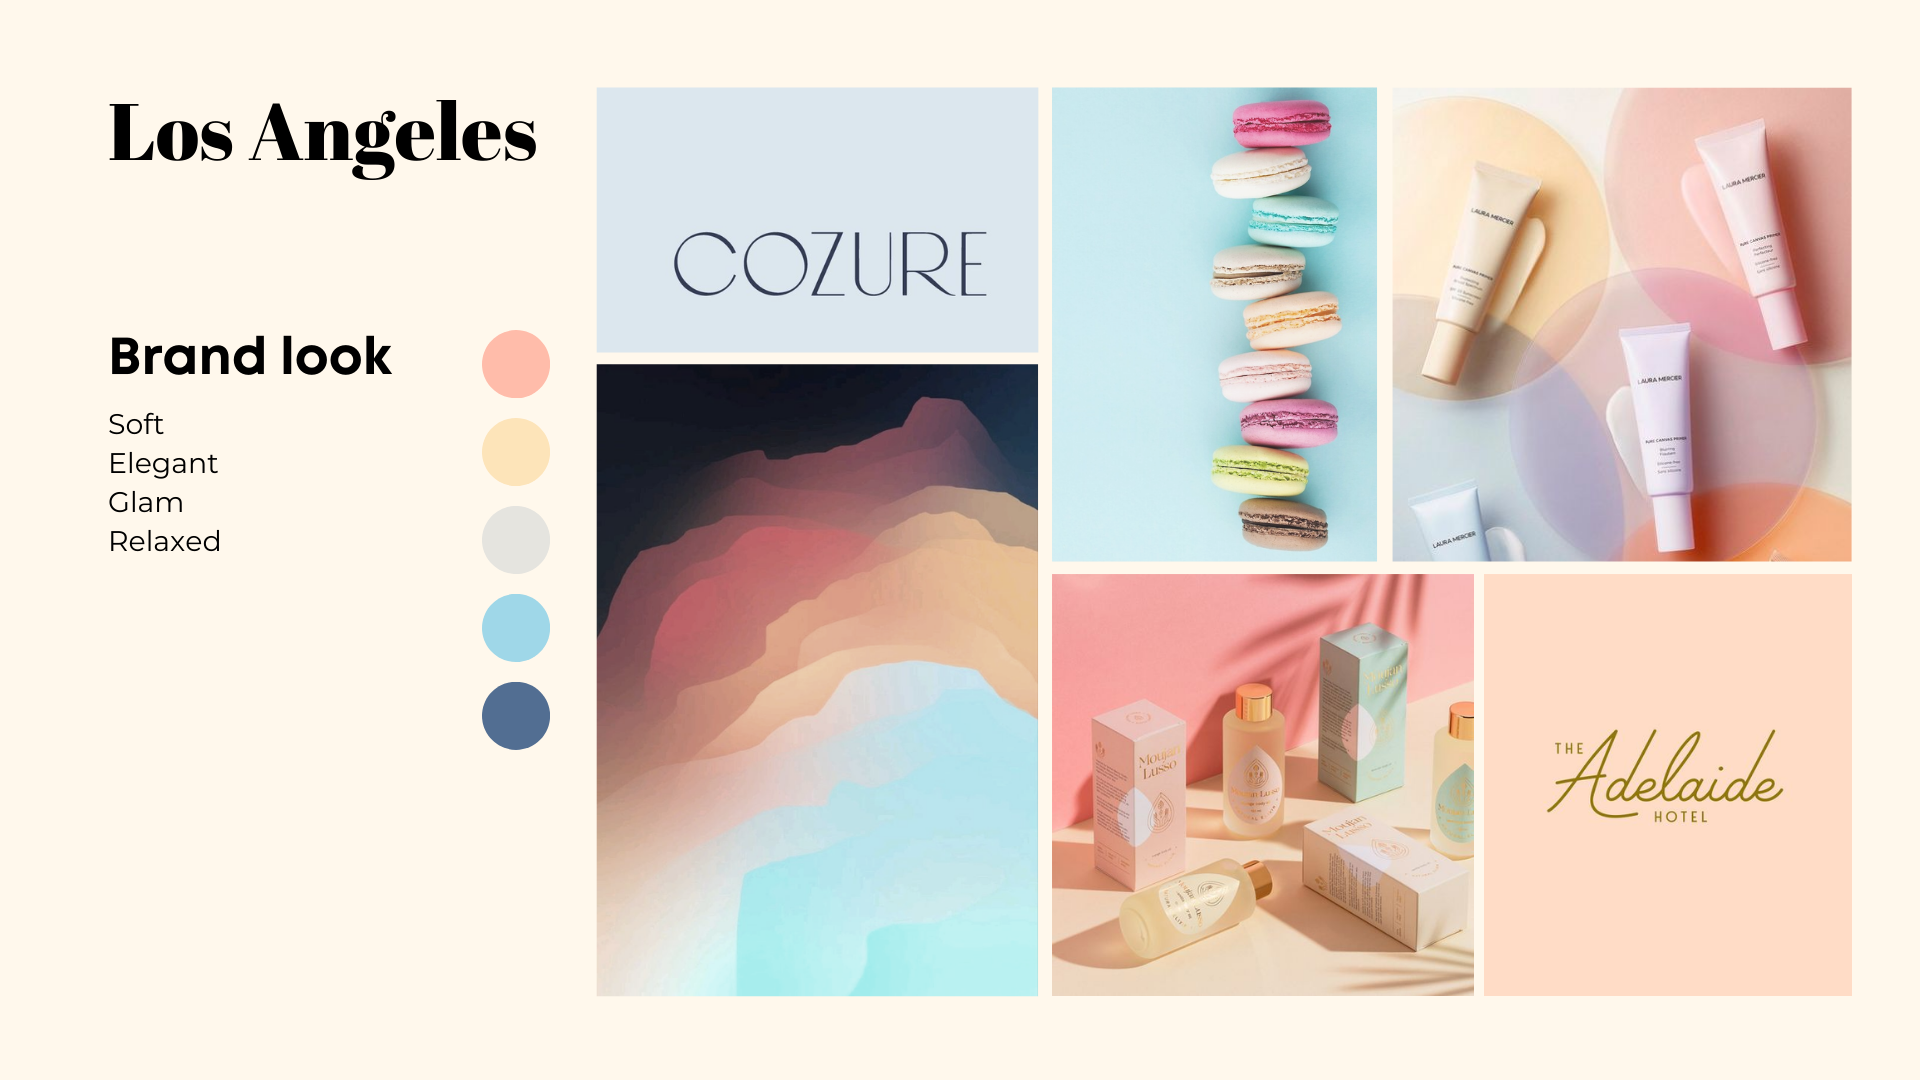
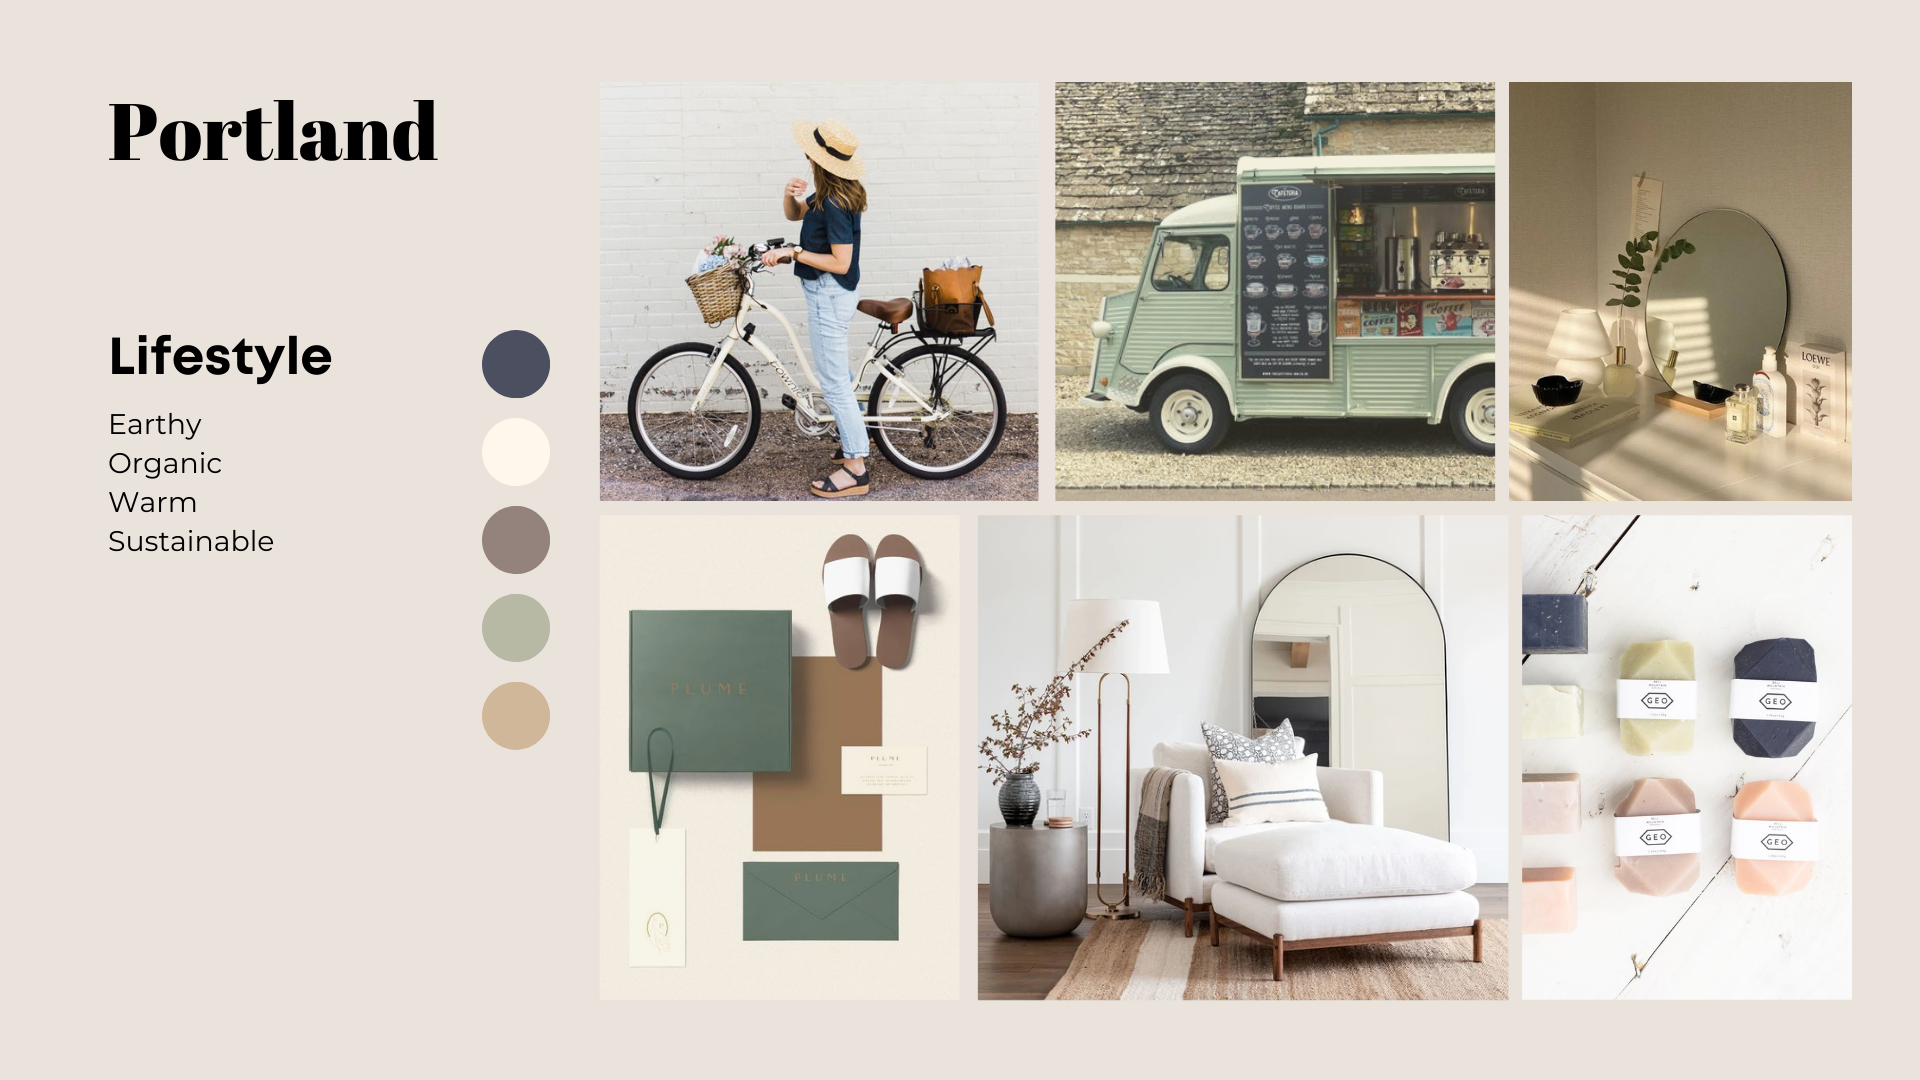
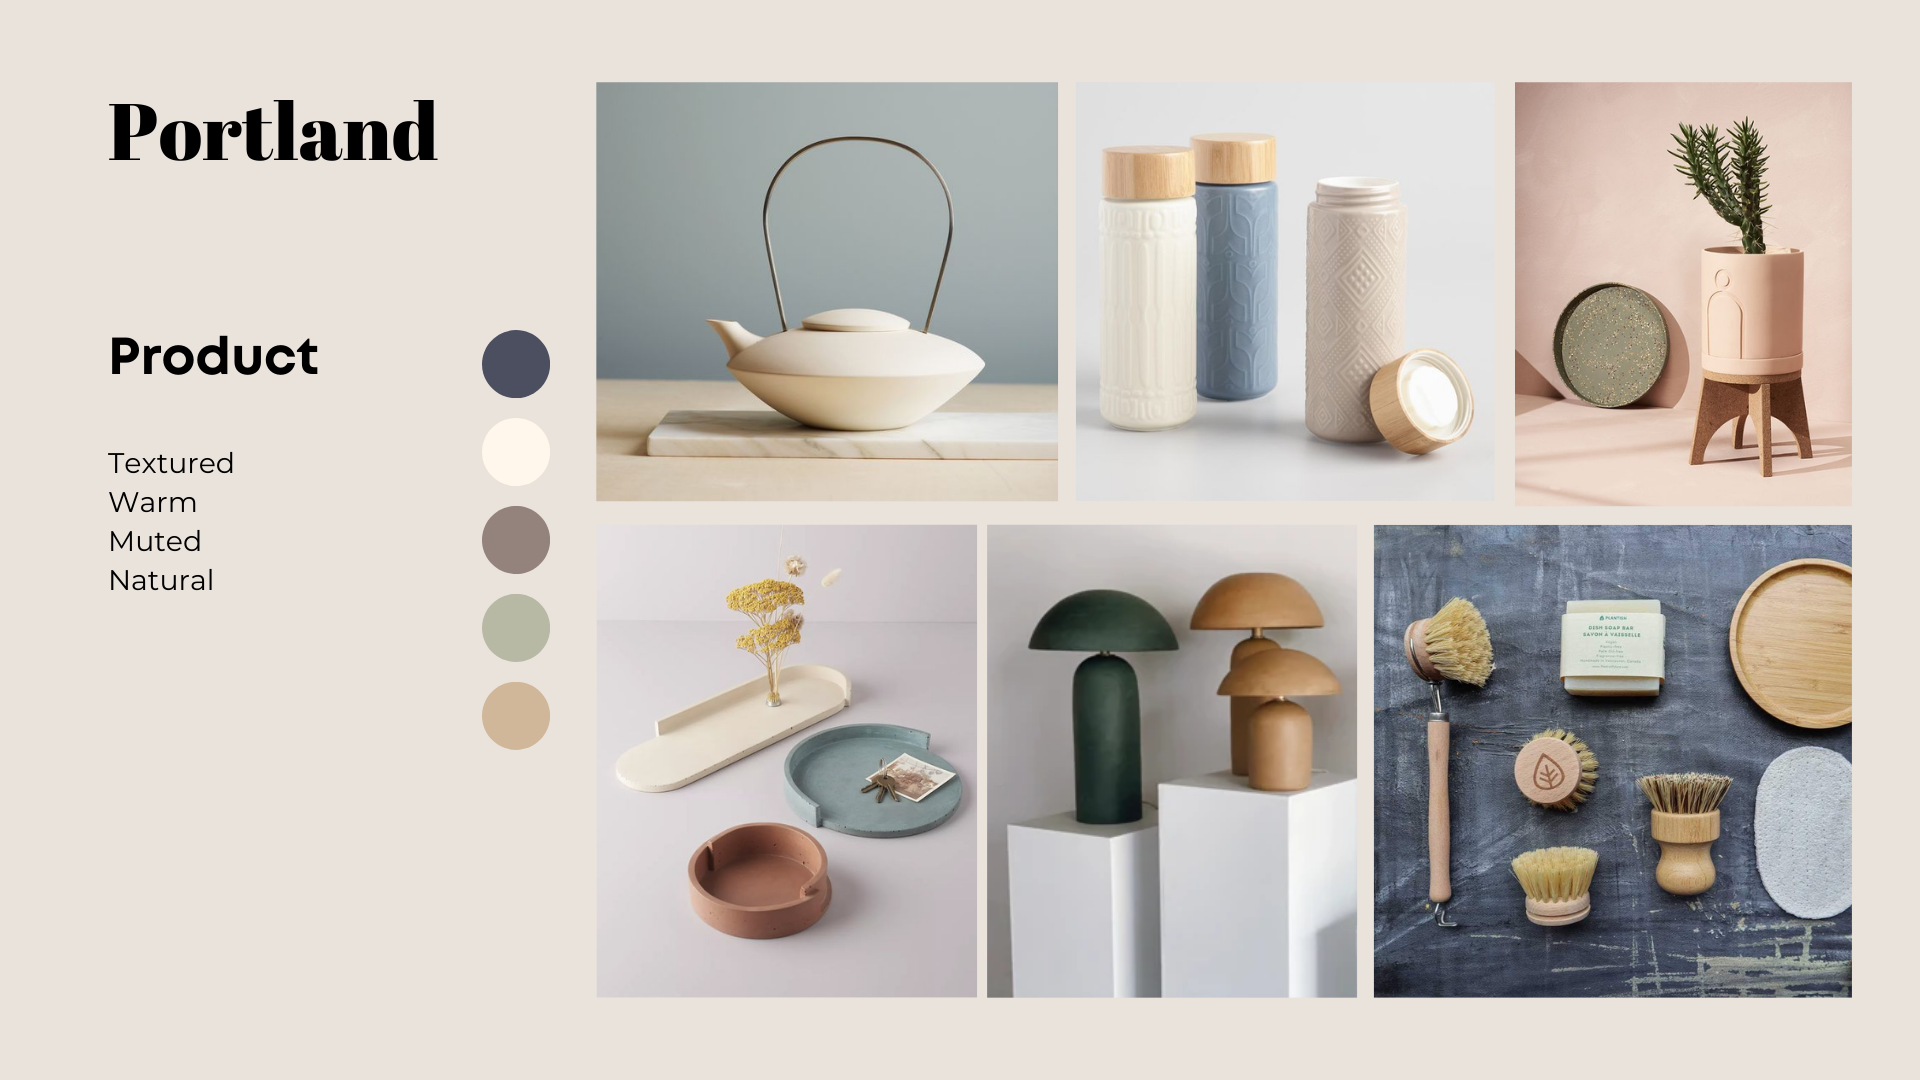
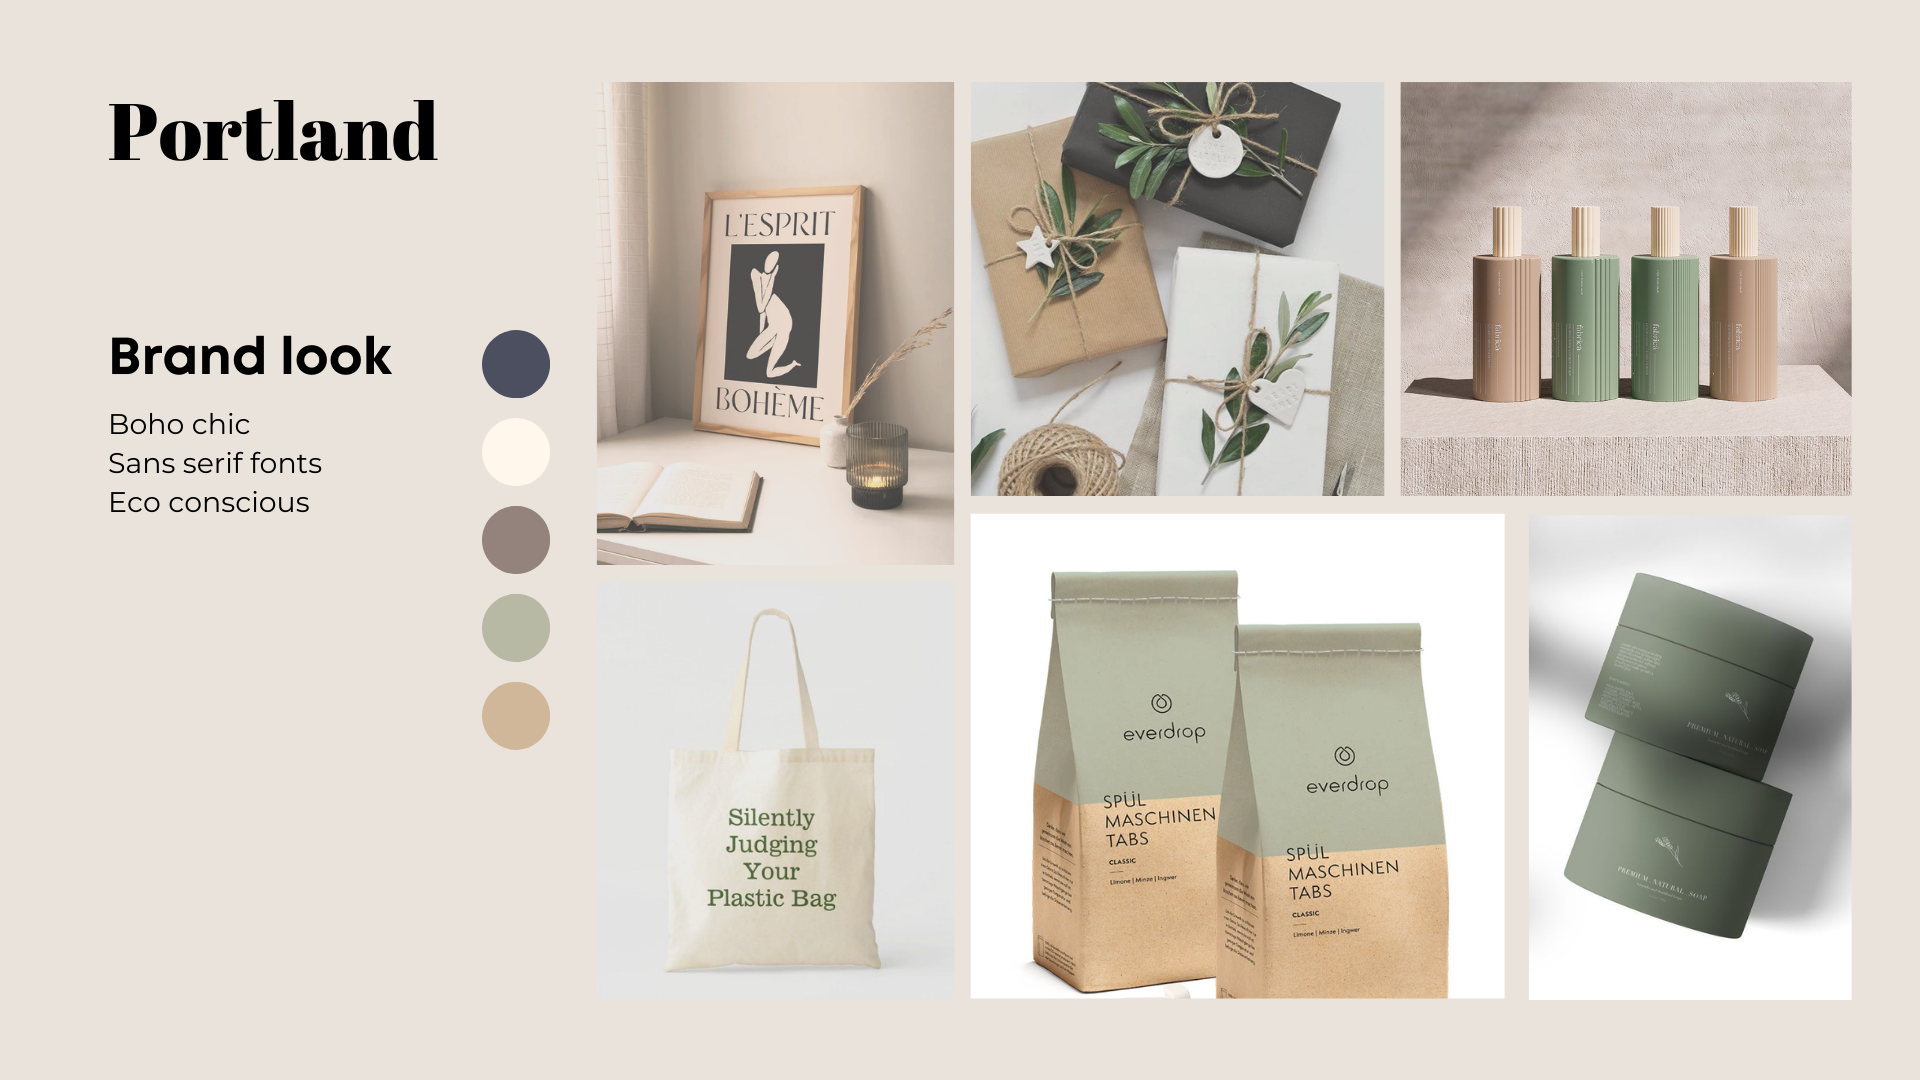
When we create the first product for a new brand, we need to build from the ground up. Establishing a visual language of shapes, colors, lifestyle and overall ‘feel’ at the very beginning is key. We’ll refer back to this throughout the project and it will inform the product, packaging, and graphic design and keep everything consistent.
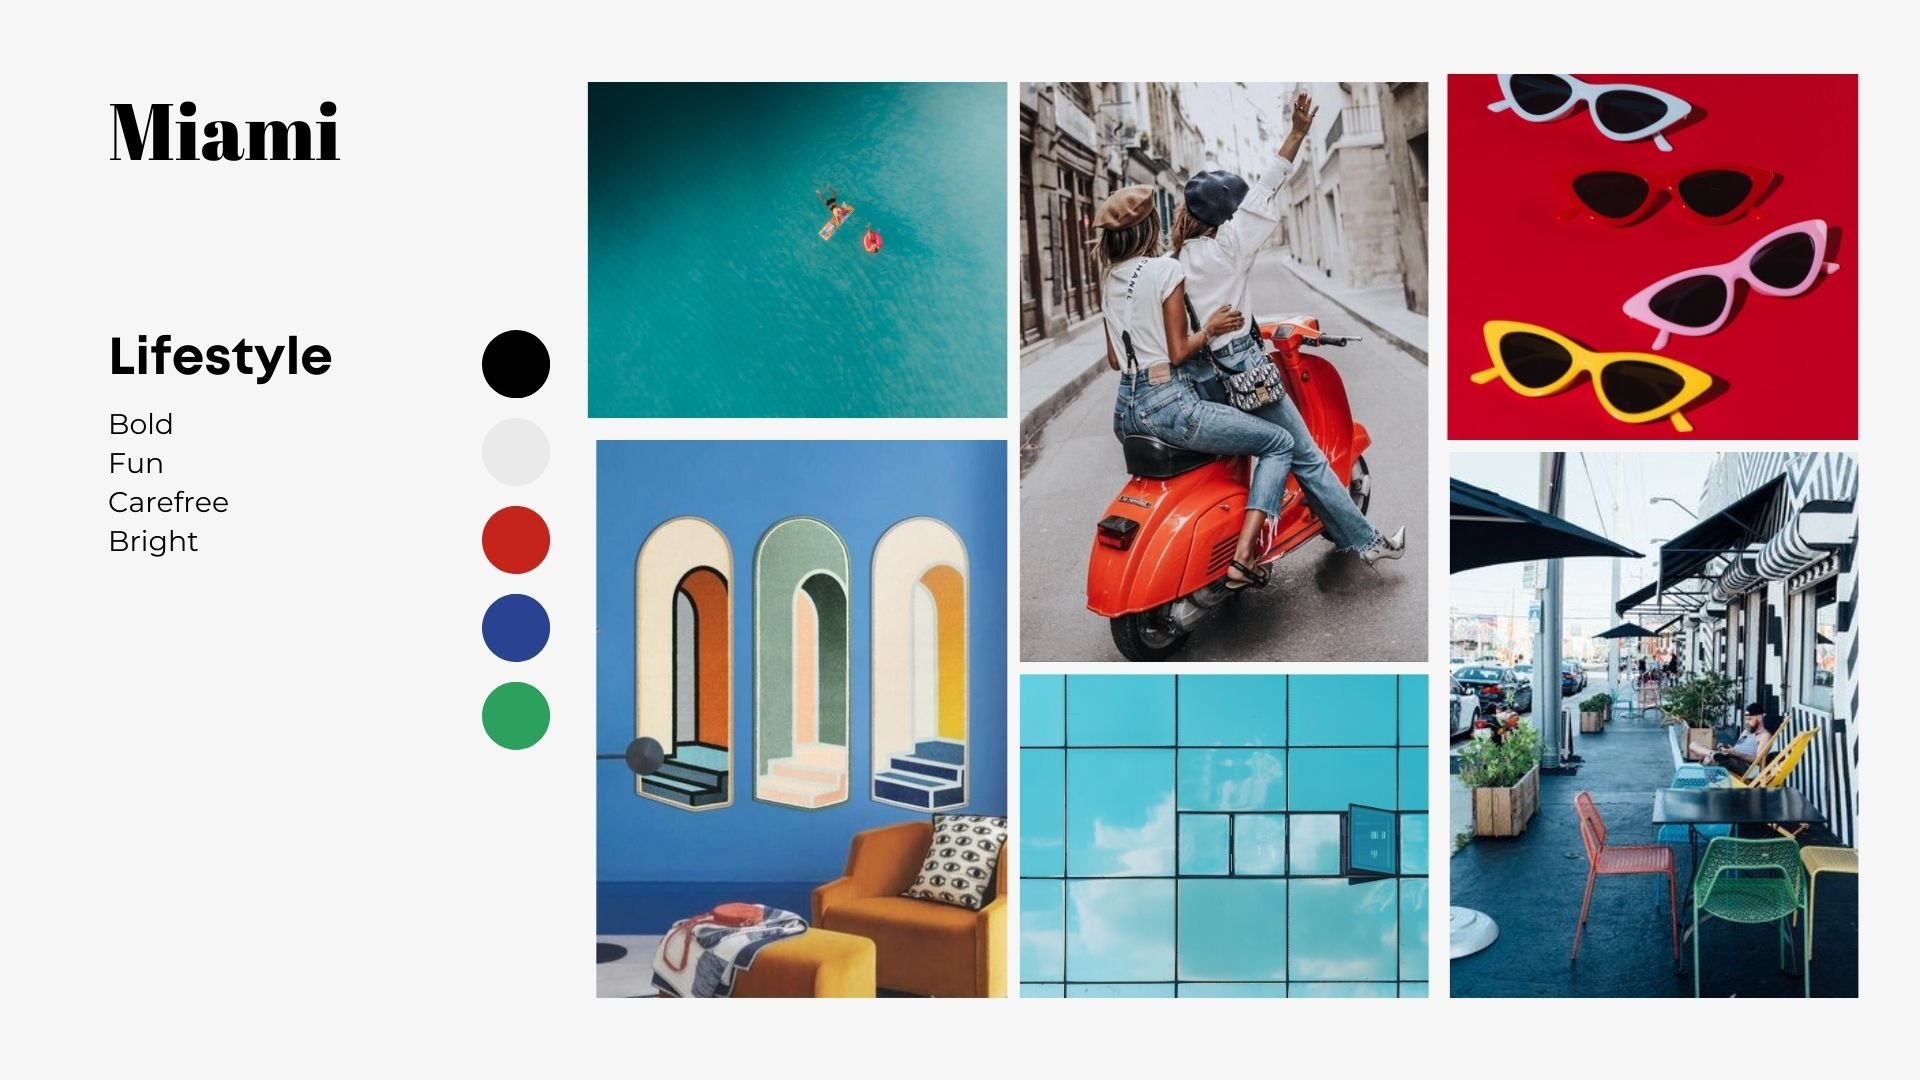
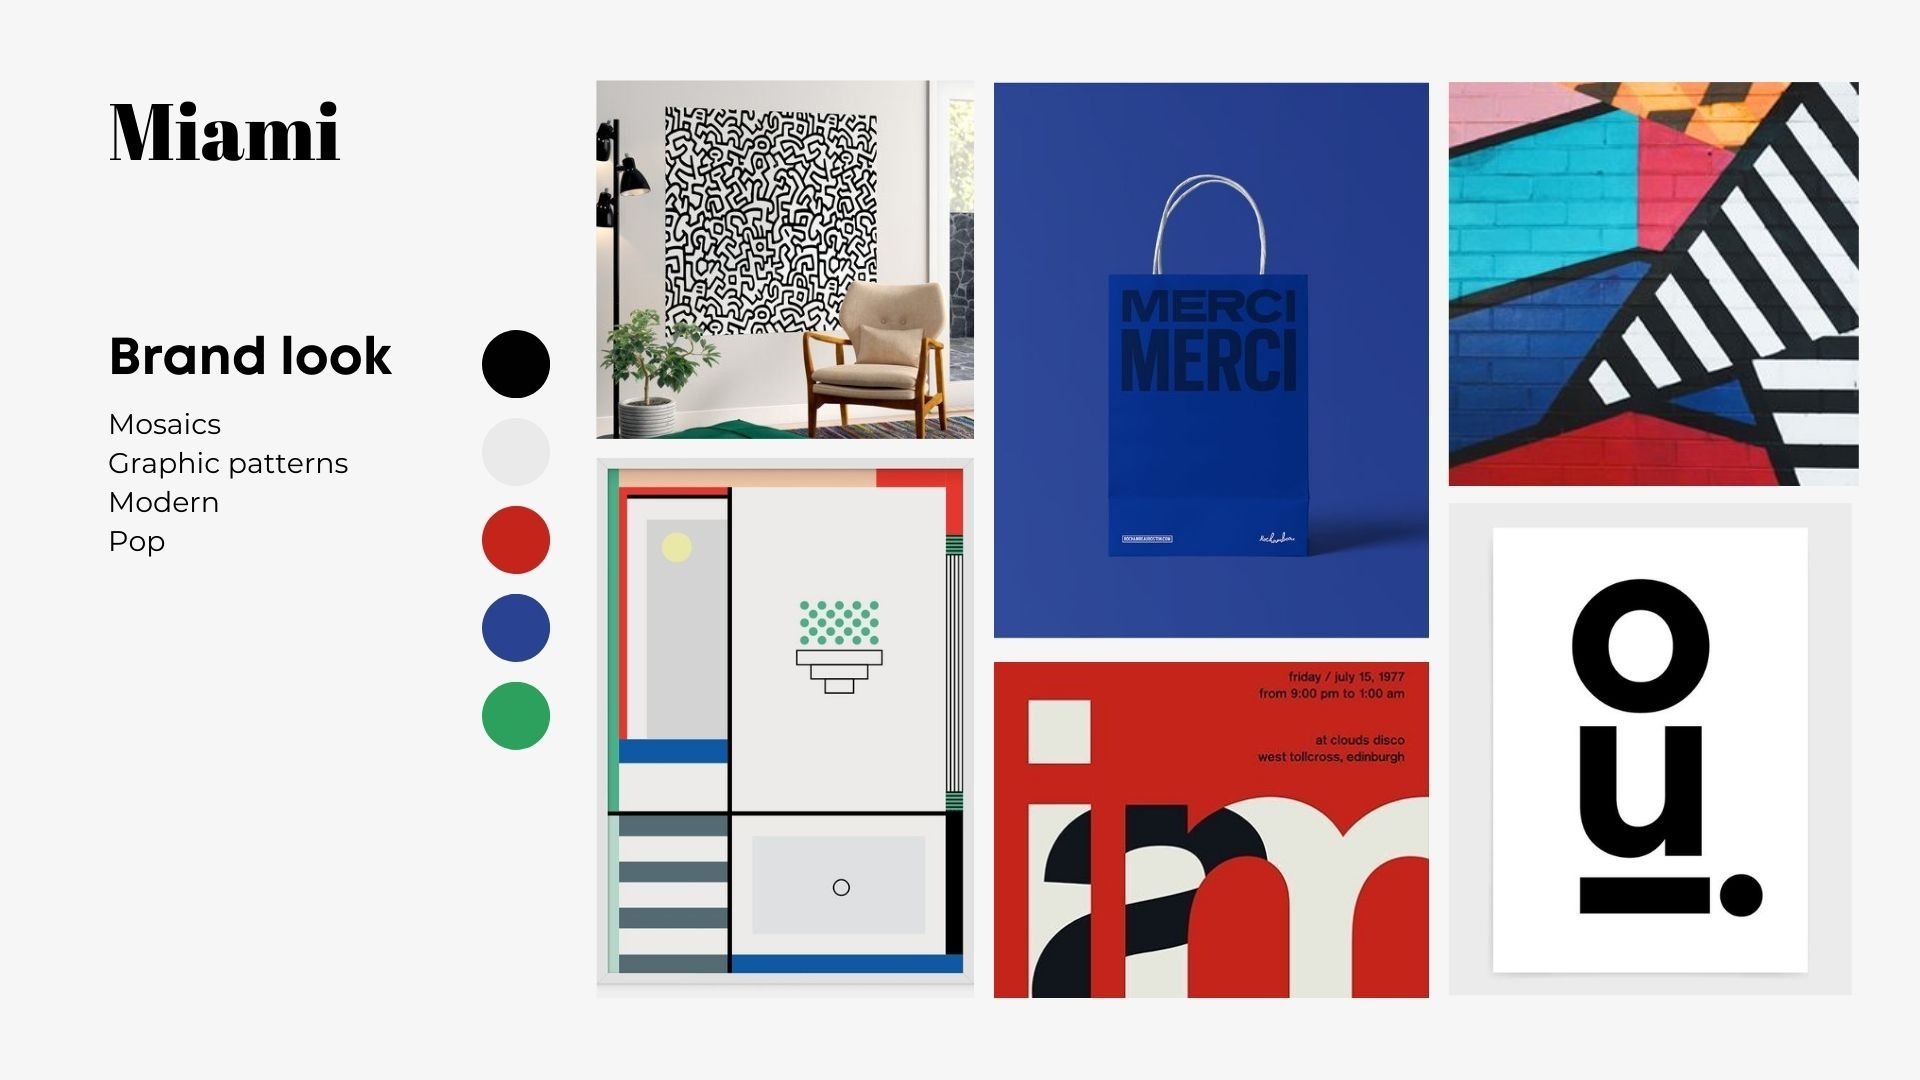
Bask had no prior brand assets in place, so we started by defining an overall mood. Using four cities as aesthetic shorthand, we created four very different visual directions that would all be consistent with the brief. The clients decided to go with MIAMI- a more colorful look than we generally select, and a fun challenge.
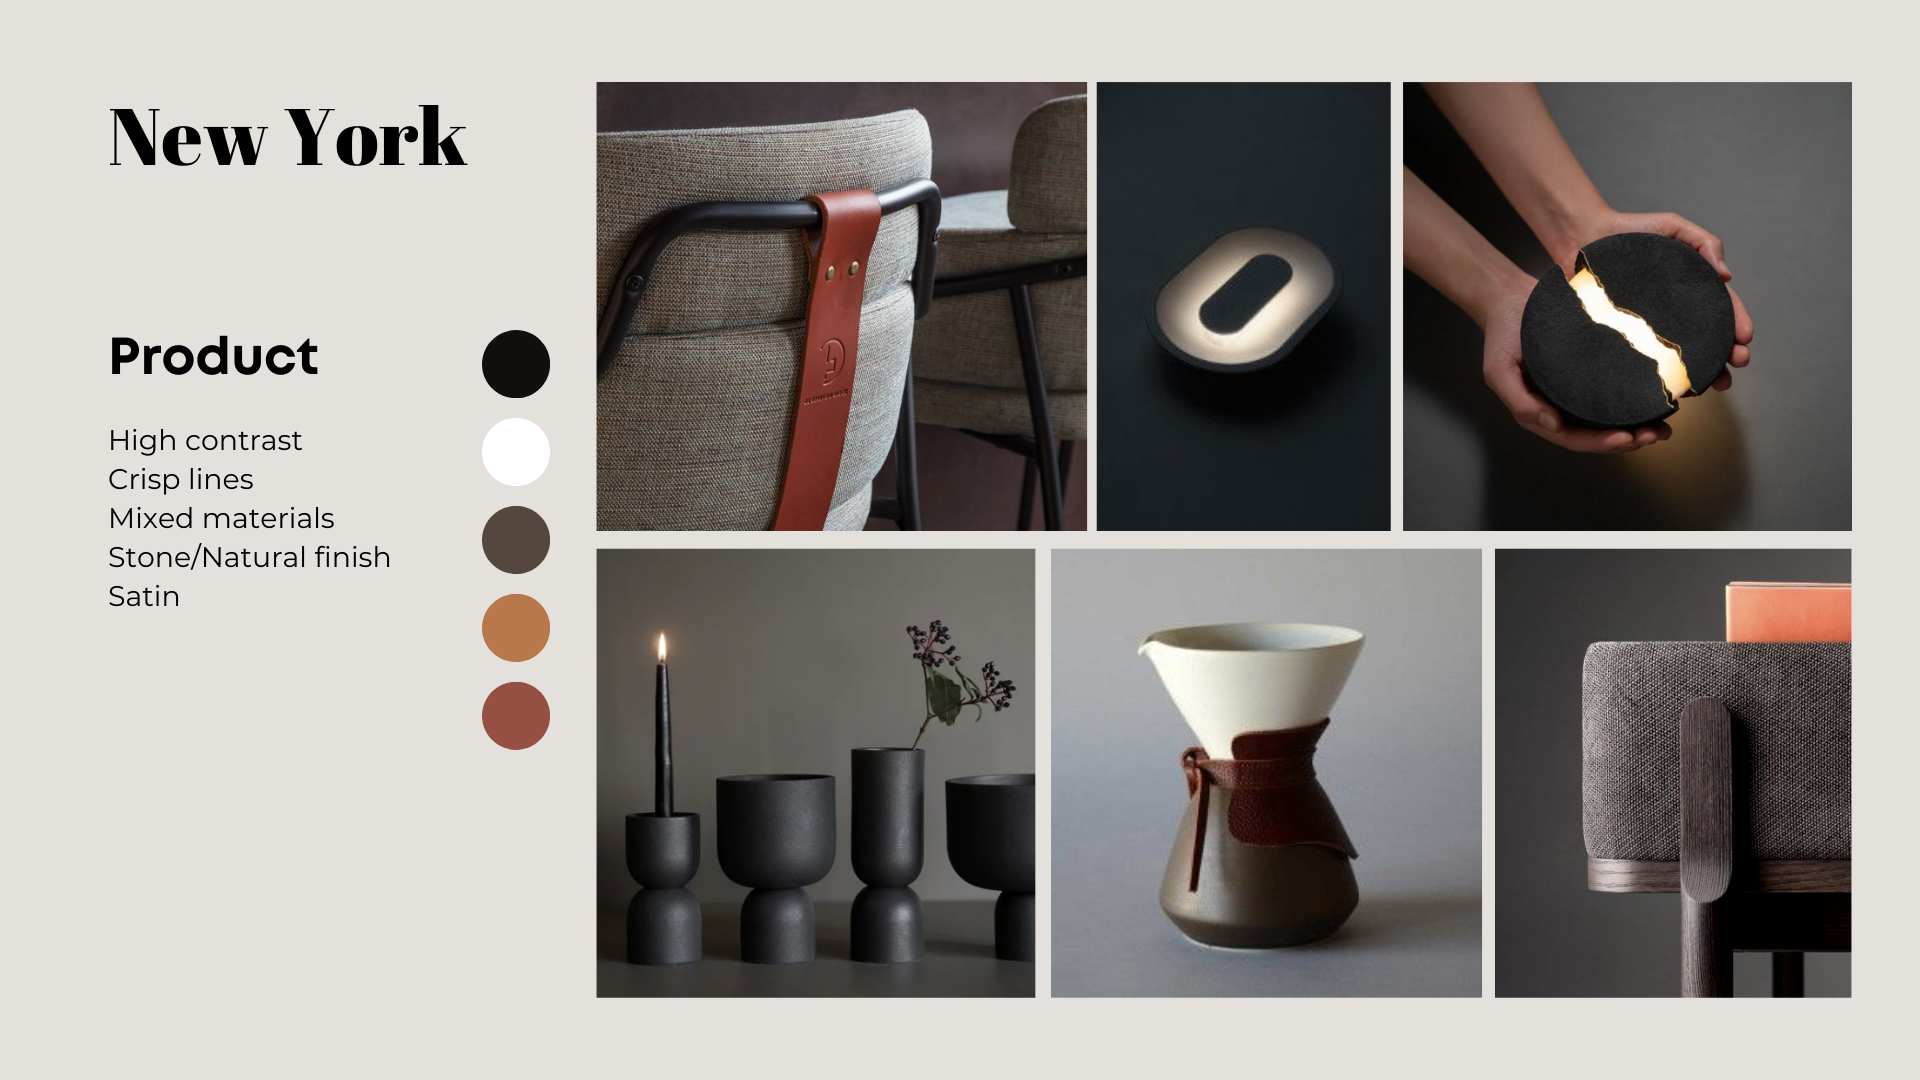
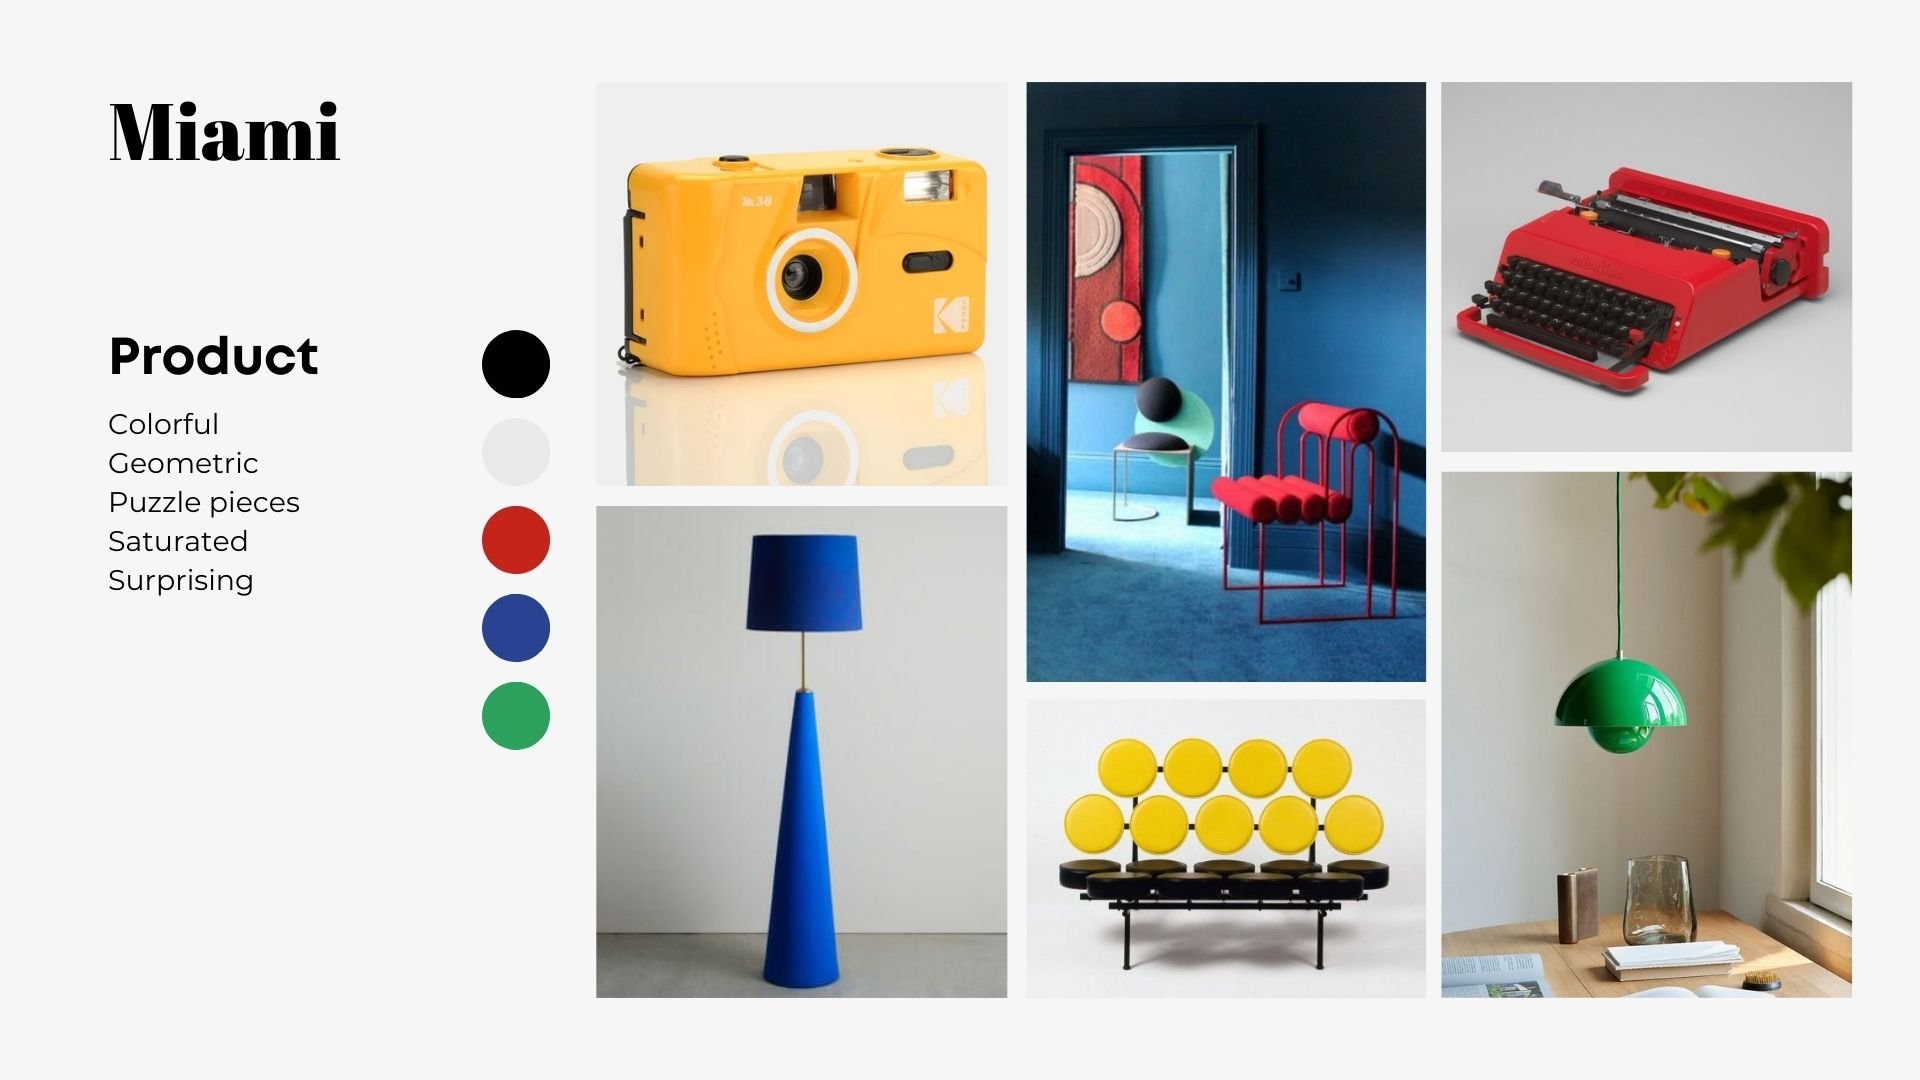
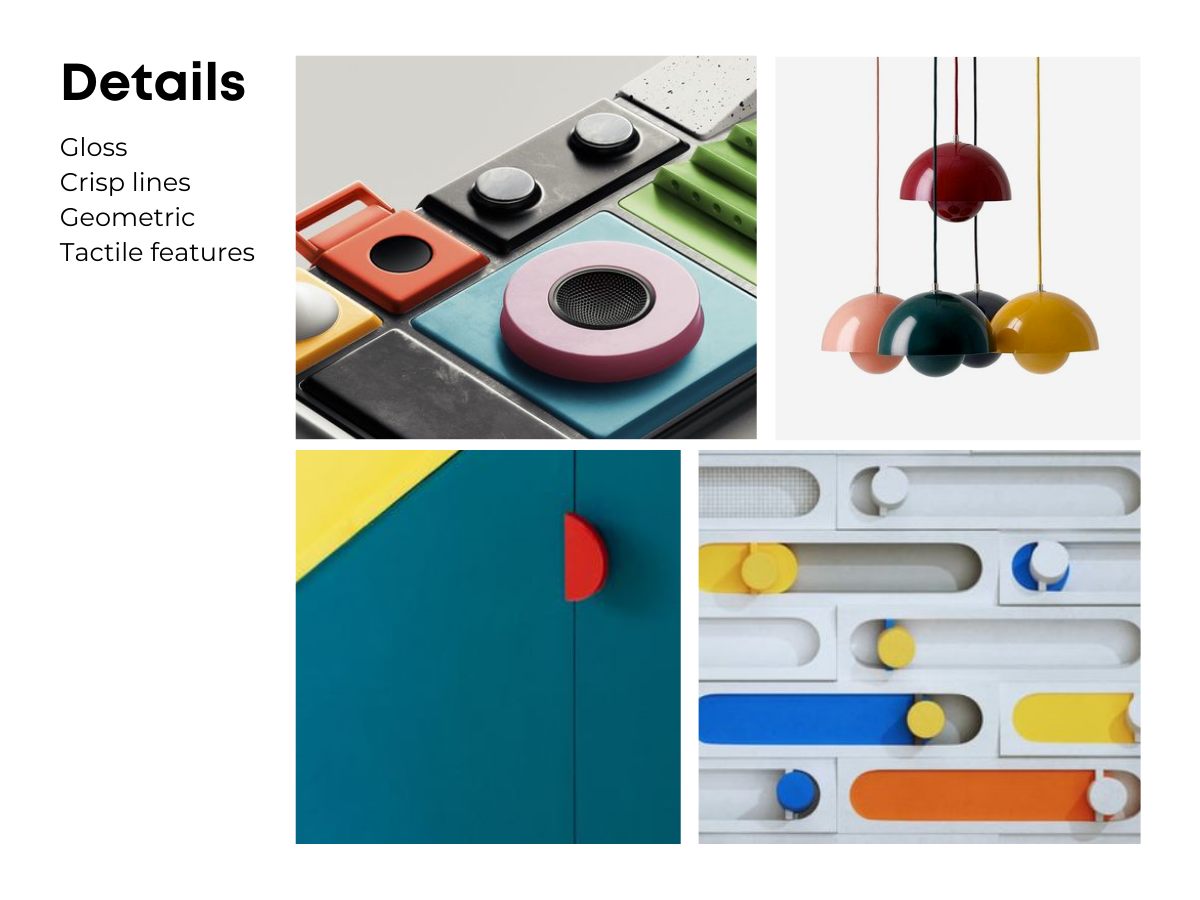
PRODUCT DETAILS
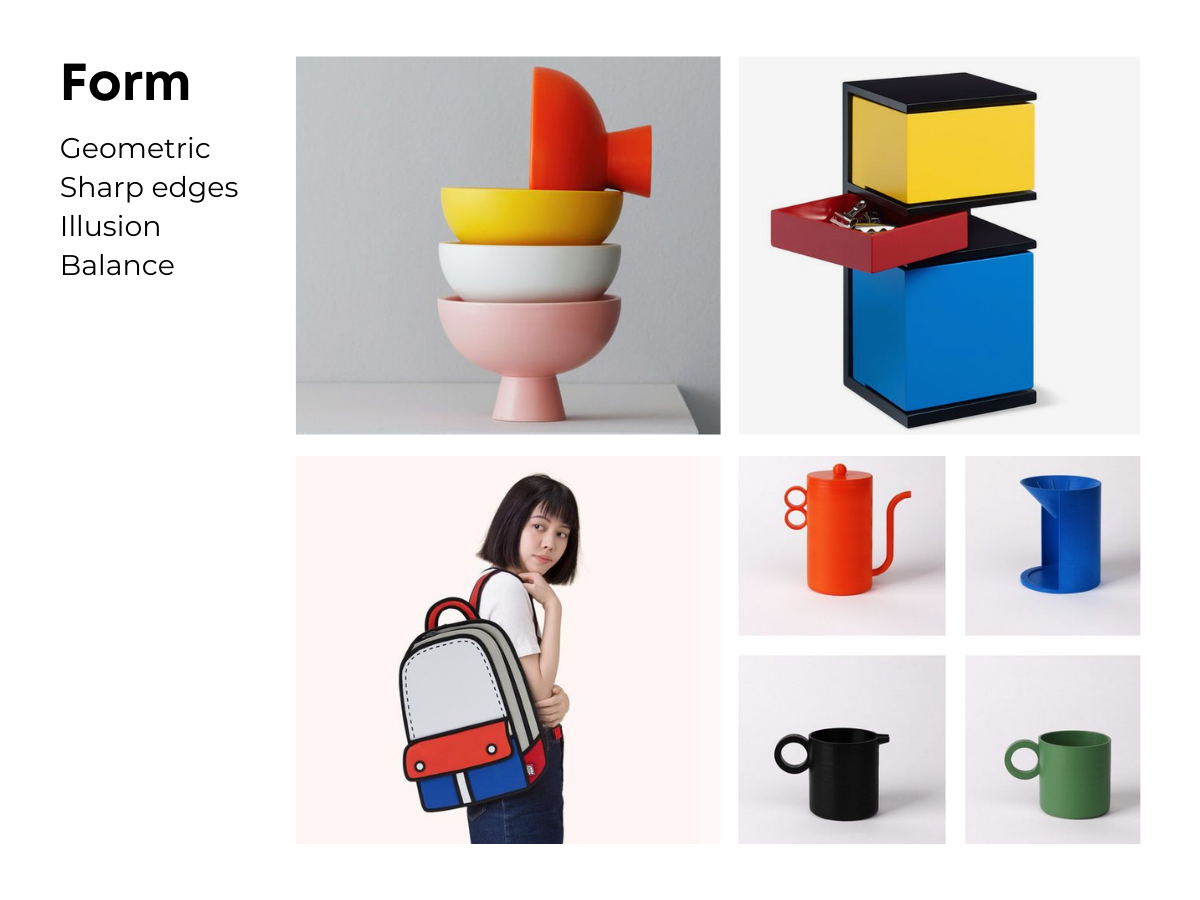
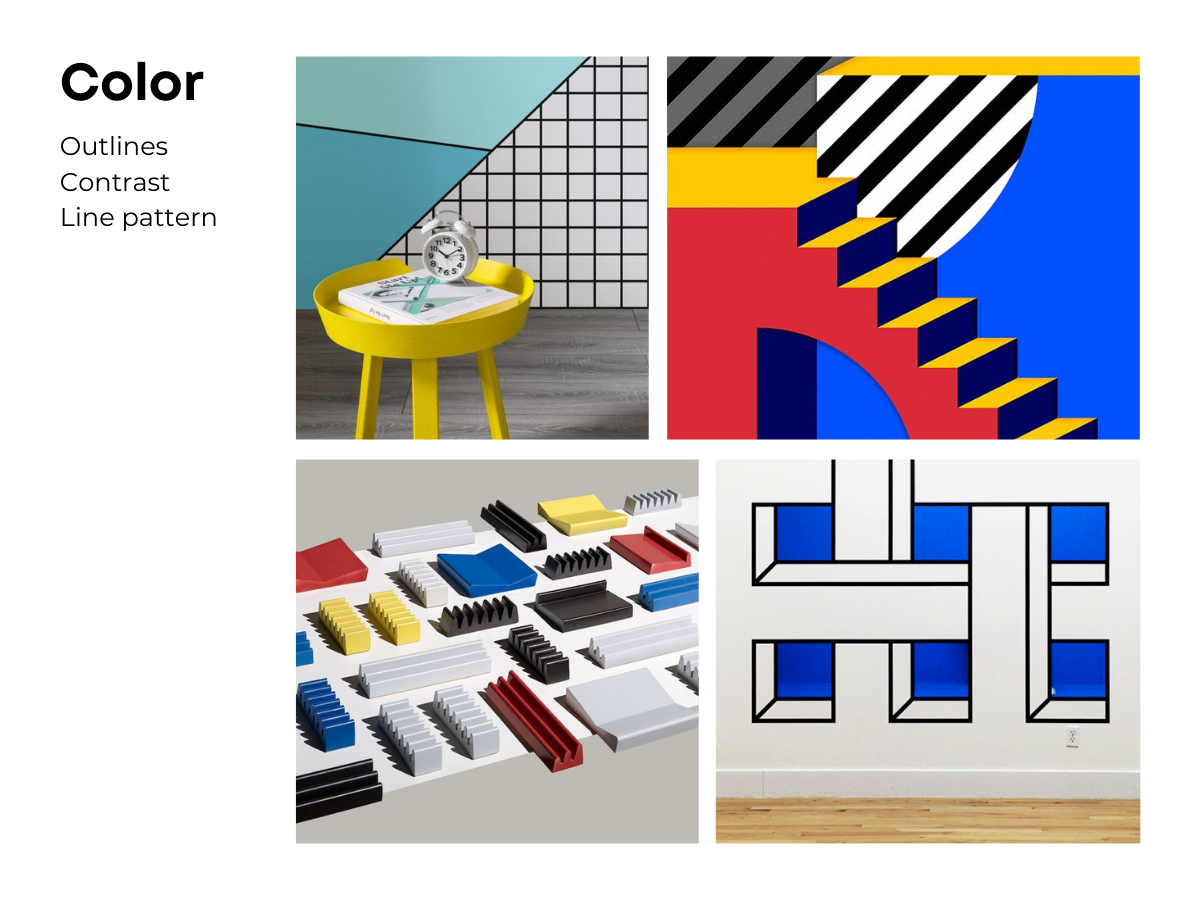
Once the general aesthetic is locked in, we pull out some key design language elements that will inform the new product. In this case, it was hot colors, clean lines, and illusionistic colorblock visuals. We created some more specific inspiration boards showing these elements in contexts that struck an appropriate tone of sophisticated fun and avoided looking too childish or simple.
Ideation
ROUGH SKETCHES
Finally, we can begin to design! Quick ideation sketches help us picture how the product could look and behave, identify strong directions and discard weak ones. We rarely share these rough-and-ready drawings outside the team. The ones below are heavily tidied up.

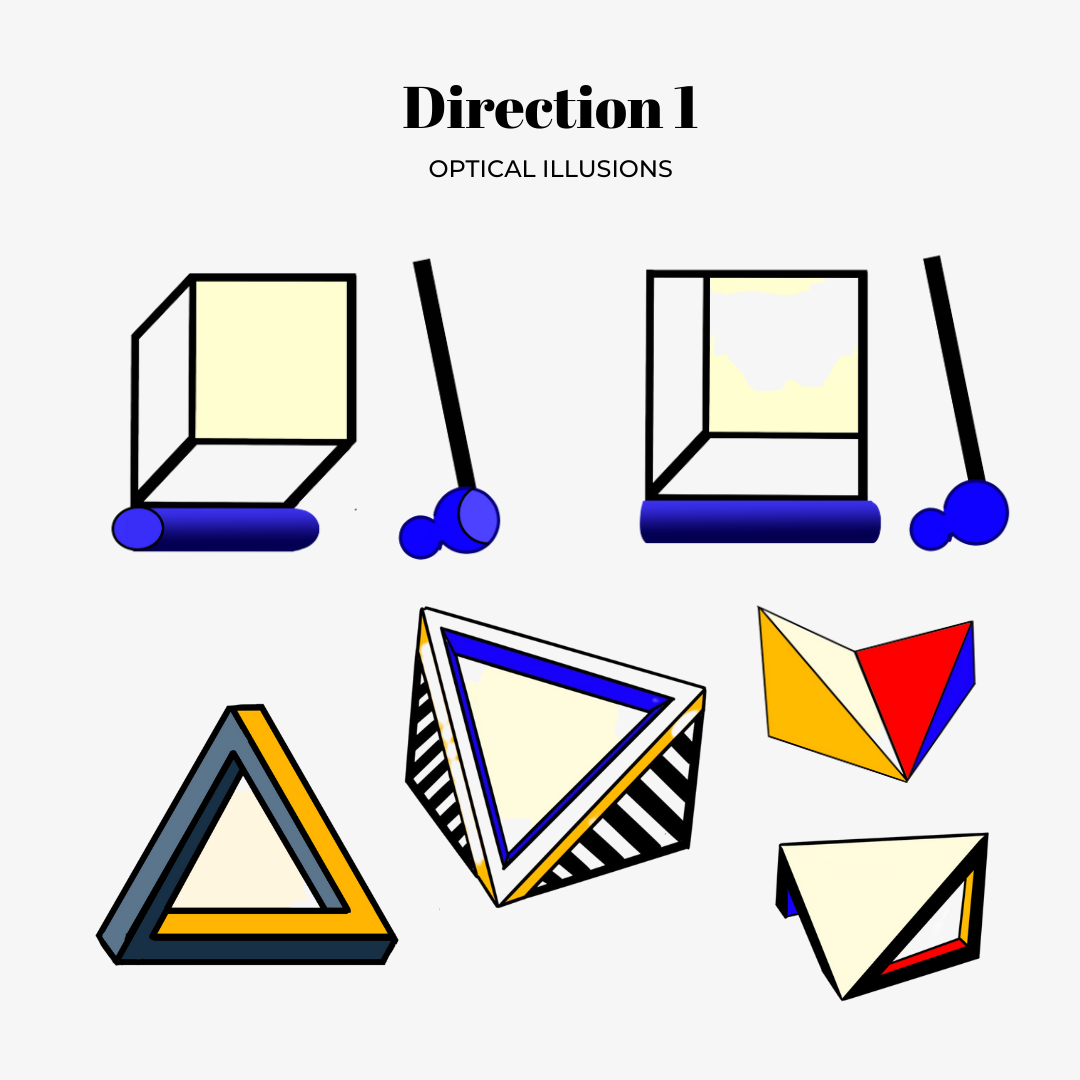
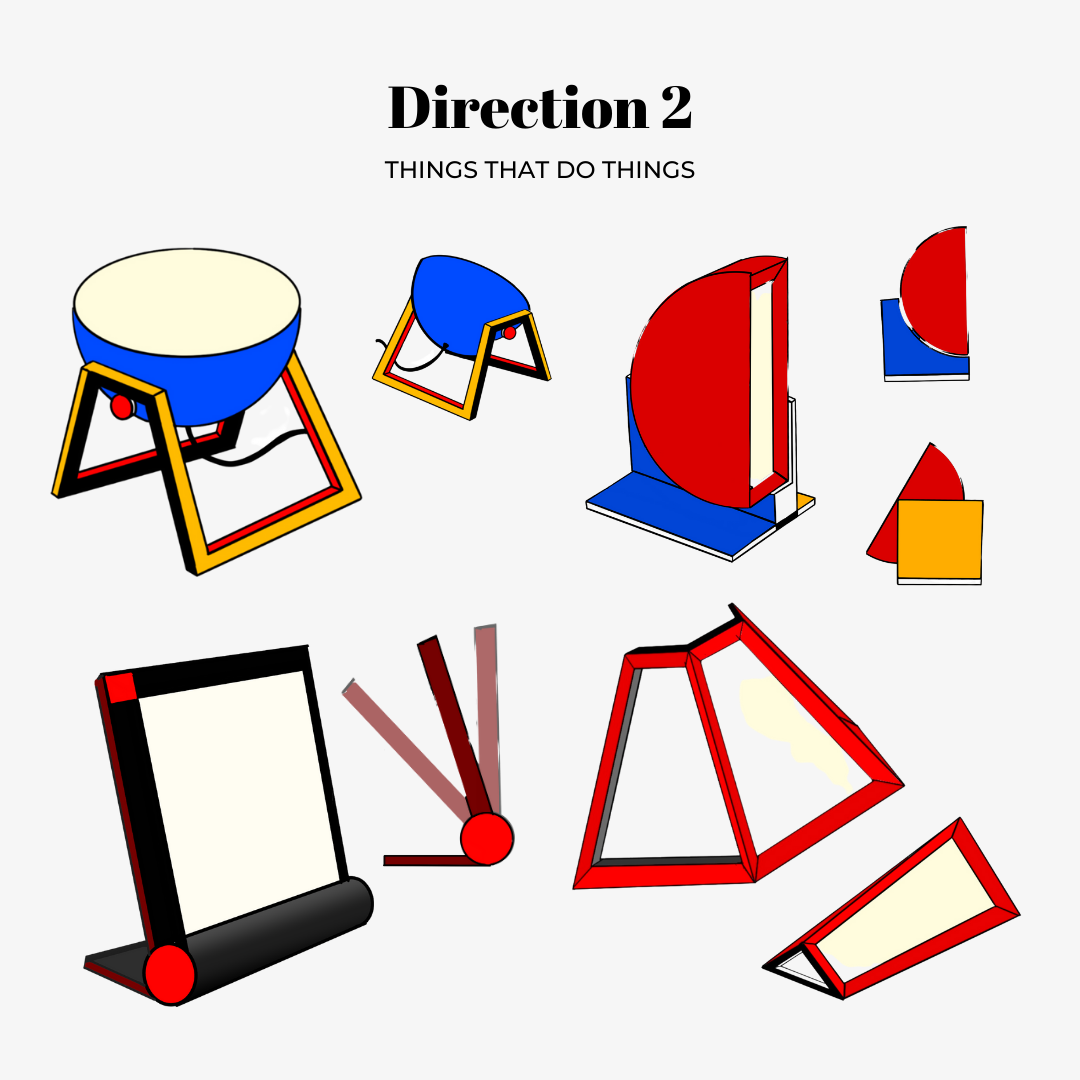
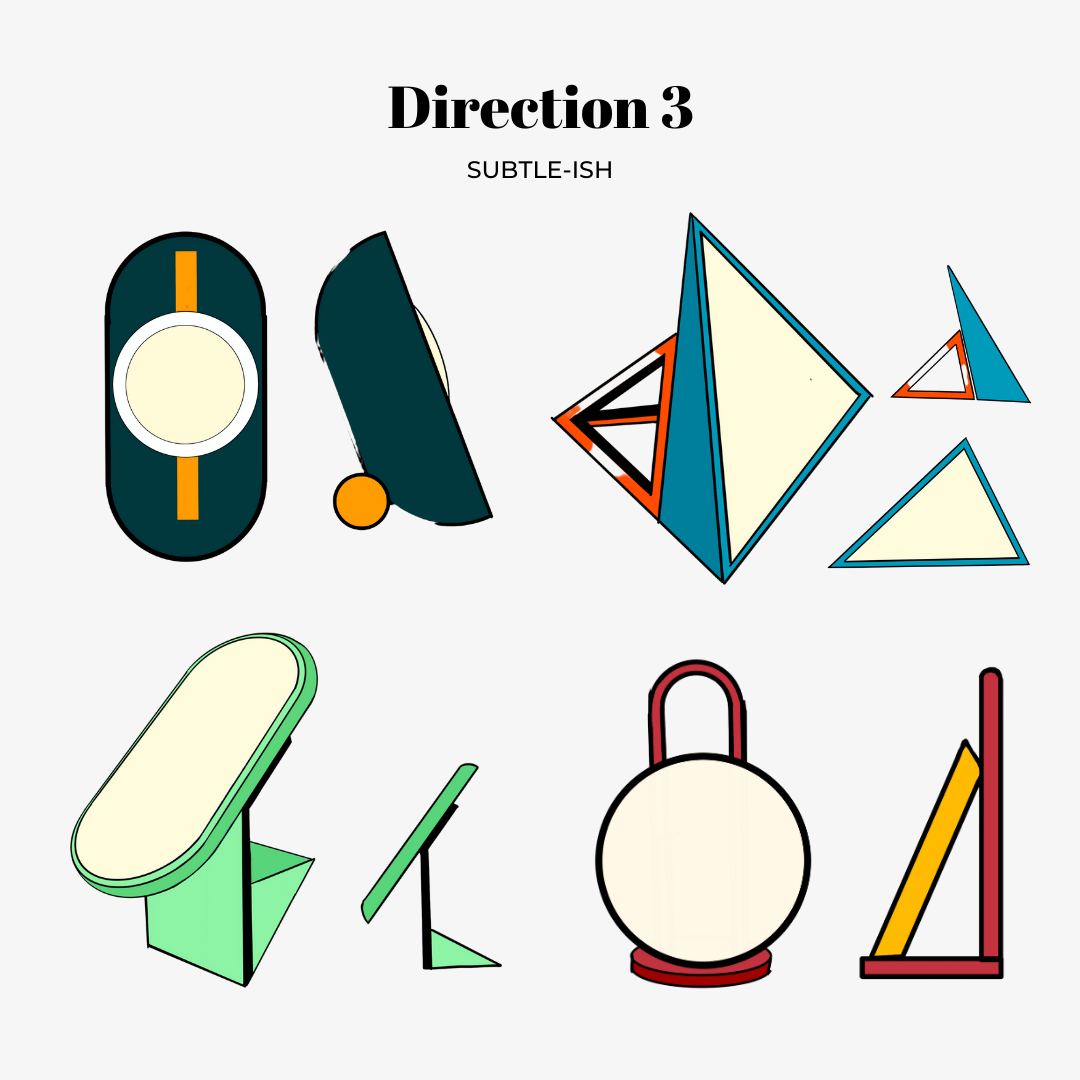
DETAILED SKETCHES
Once we’ve selected some strong concepts we flesh them out with color and detail. At this stage we also start thinking about how each concept would be manufactured— there’s no point in designing something that cannot work in the physical world. It can be helpful to divide concepts into a few basic directions to aid selection. We talk these over with the clients and conduct user surveys to identify the most viable direction(s). This is a stage where brutal editing is necessary- if we kept every feature we thought was nifty we’d never complete any projects. Good ideas that aren’t used immediately are filed away for future inspiration.
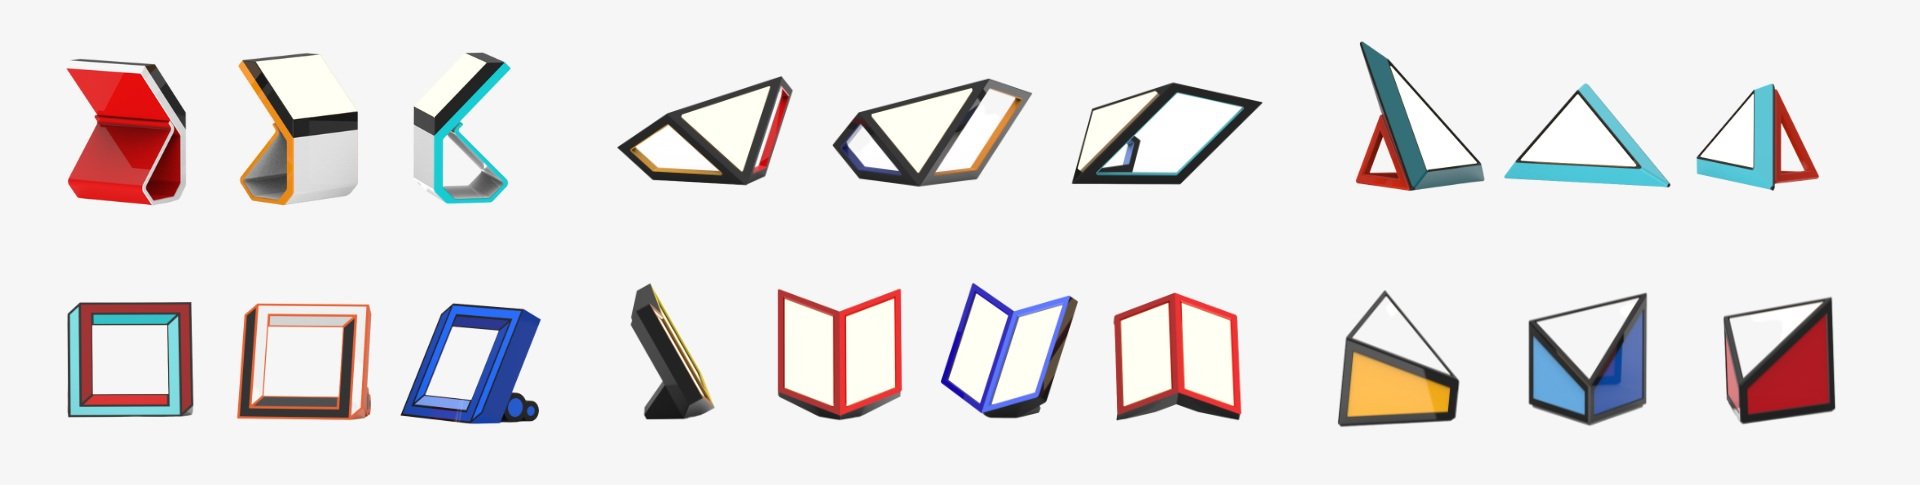
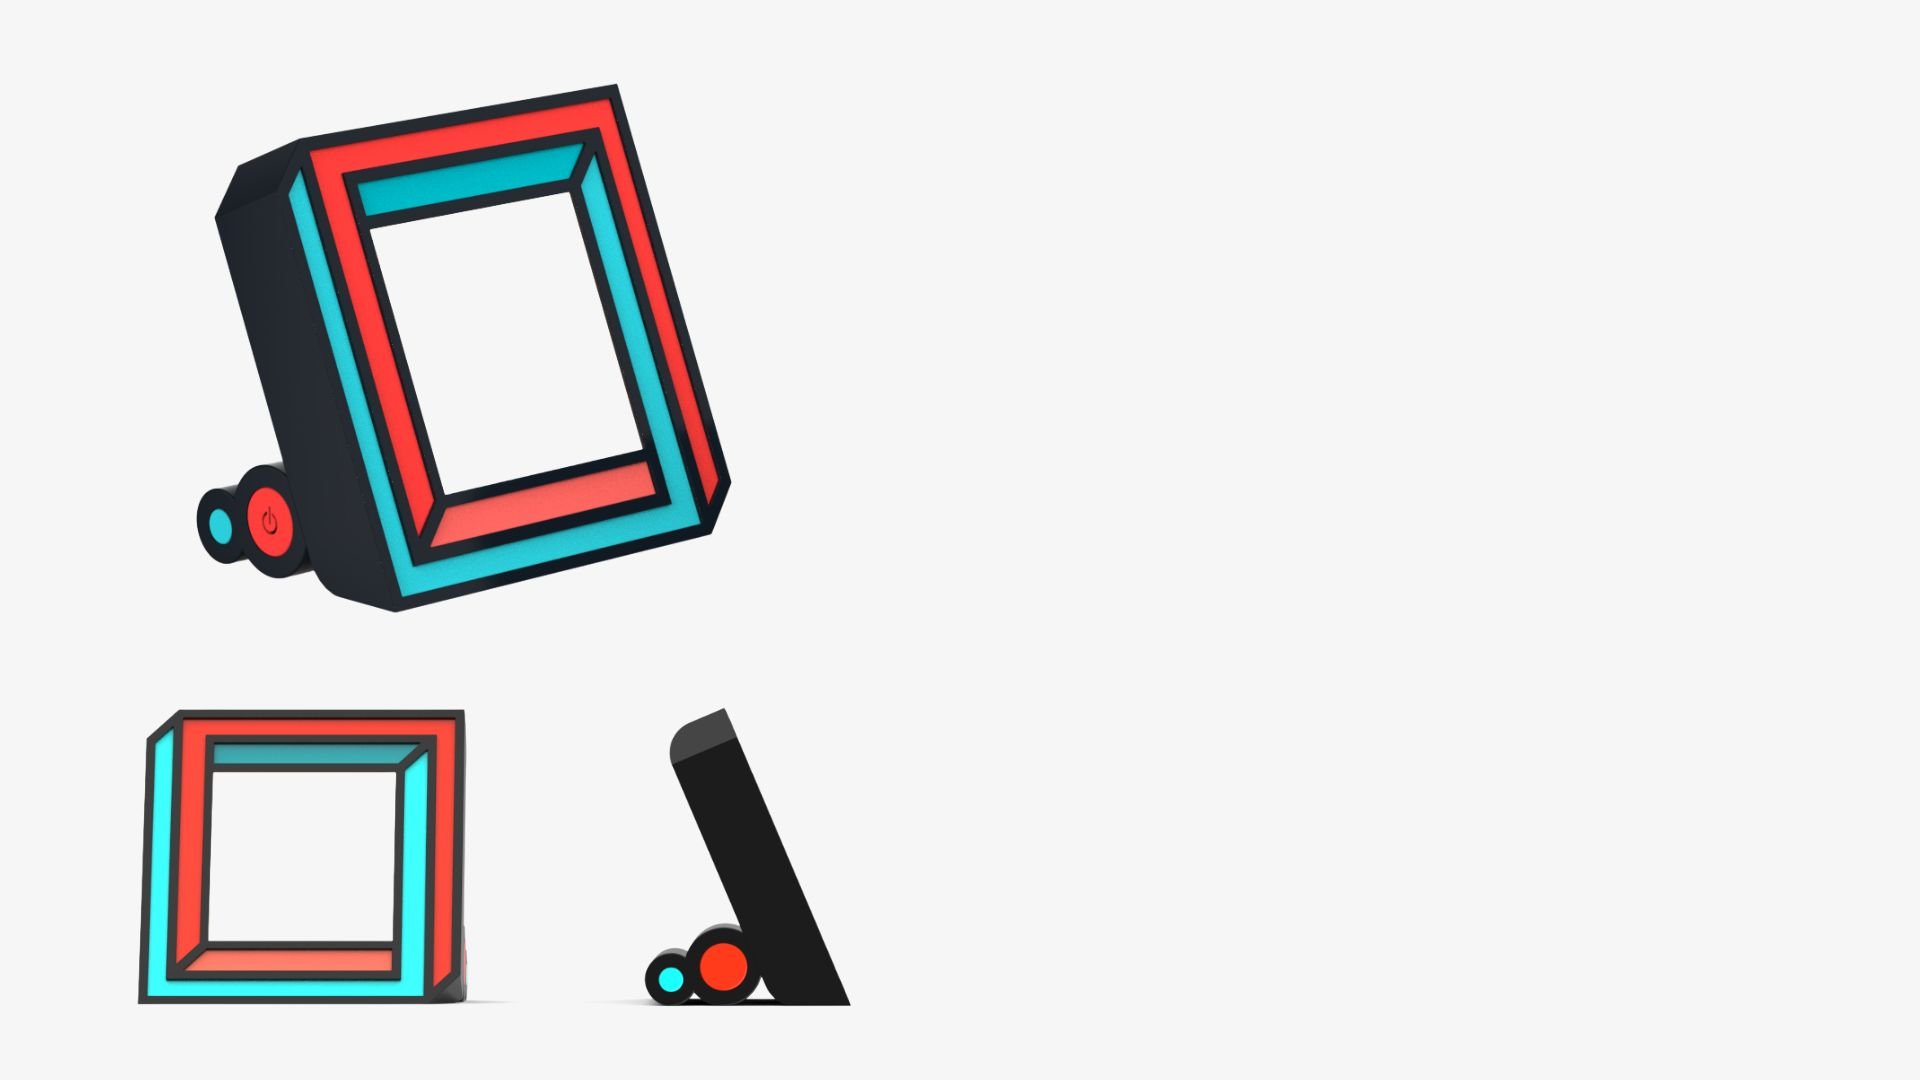
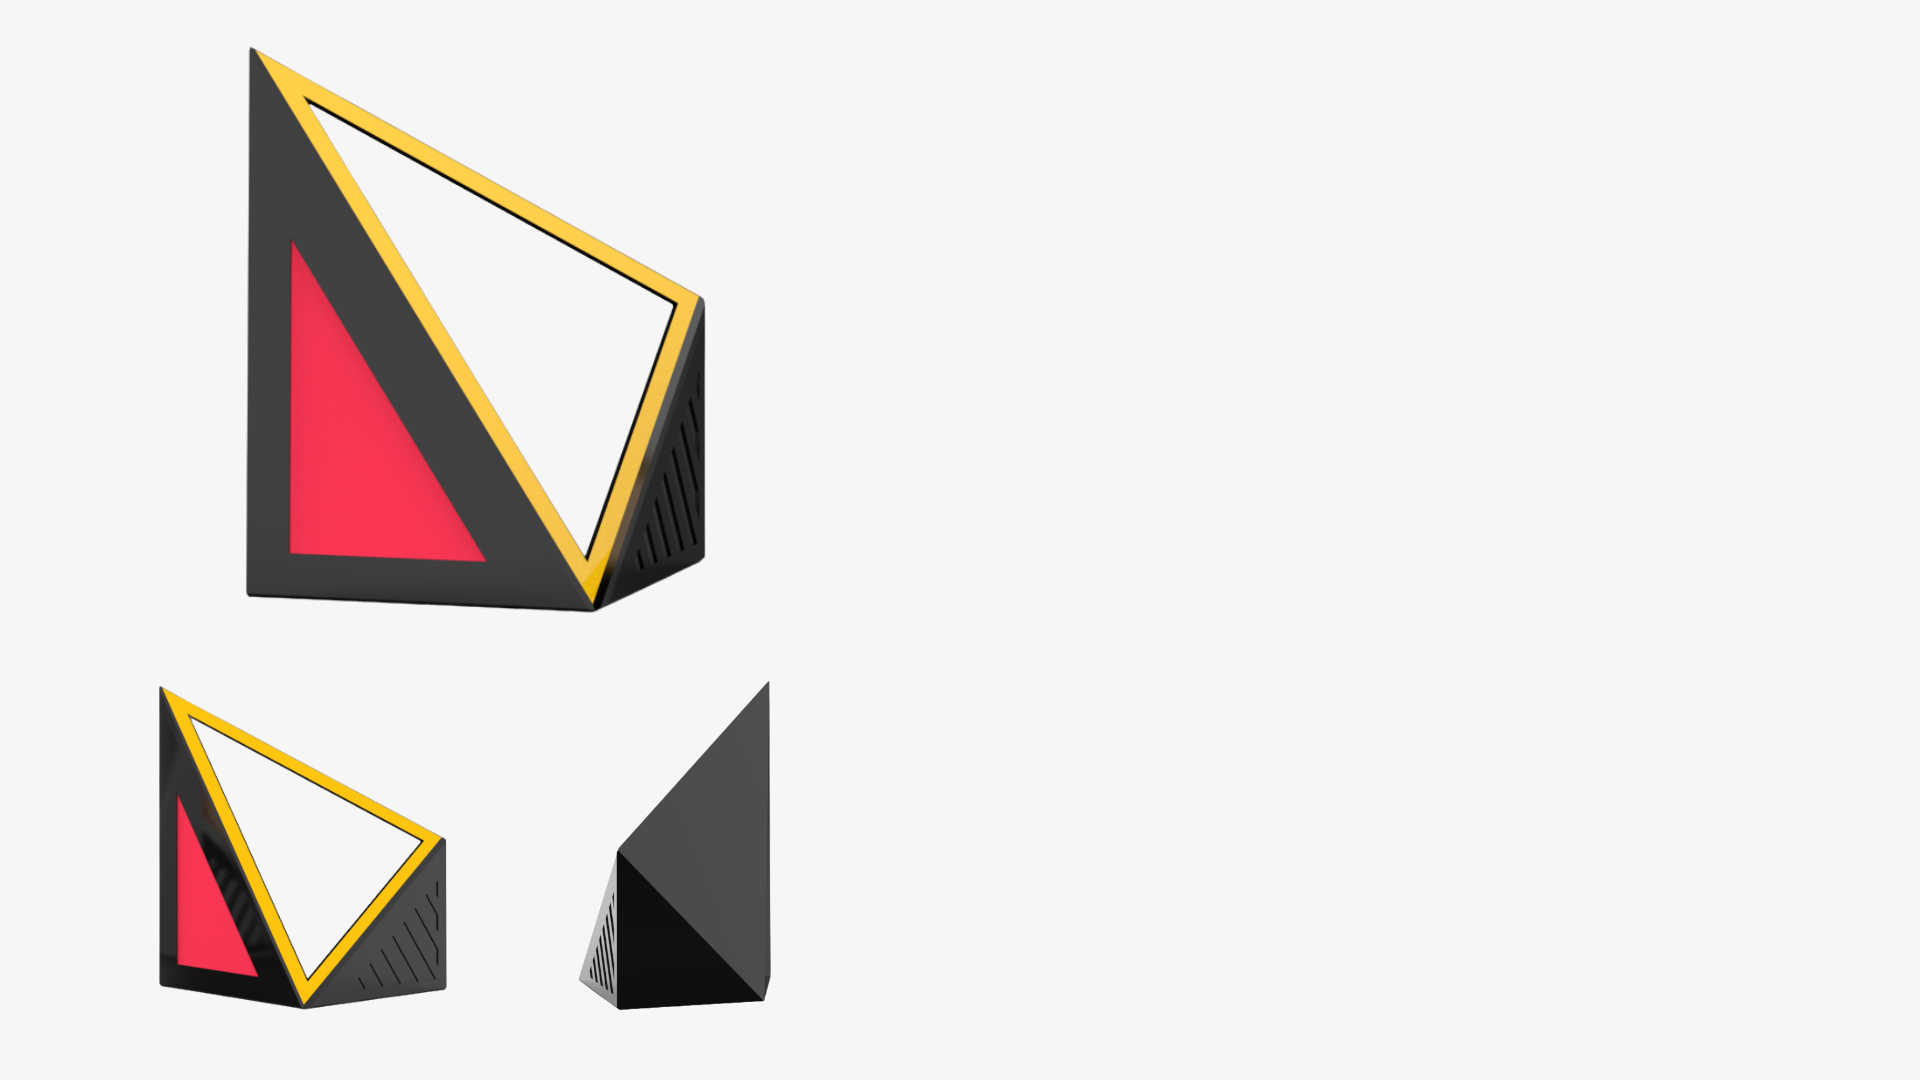
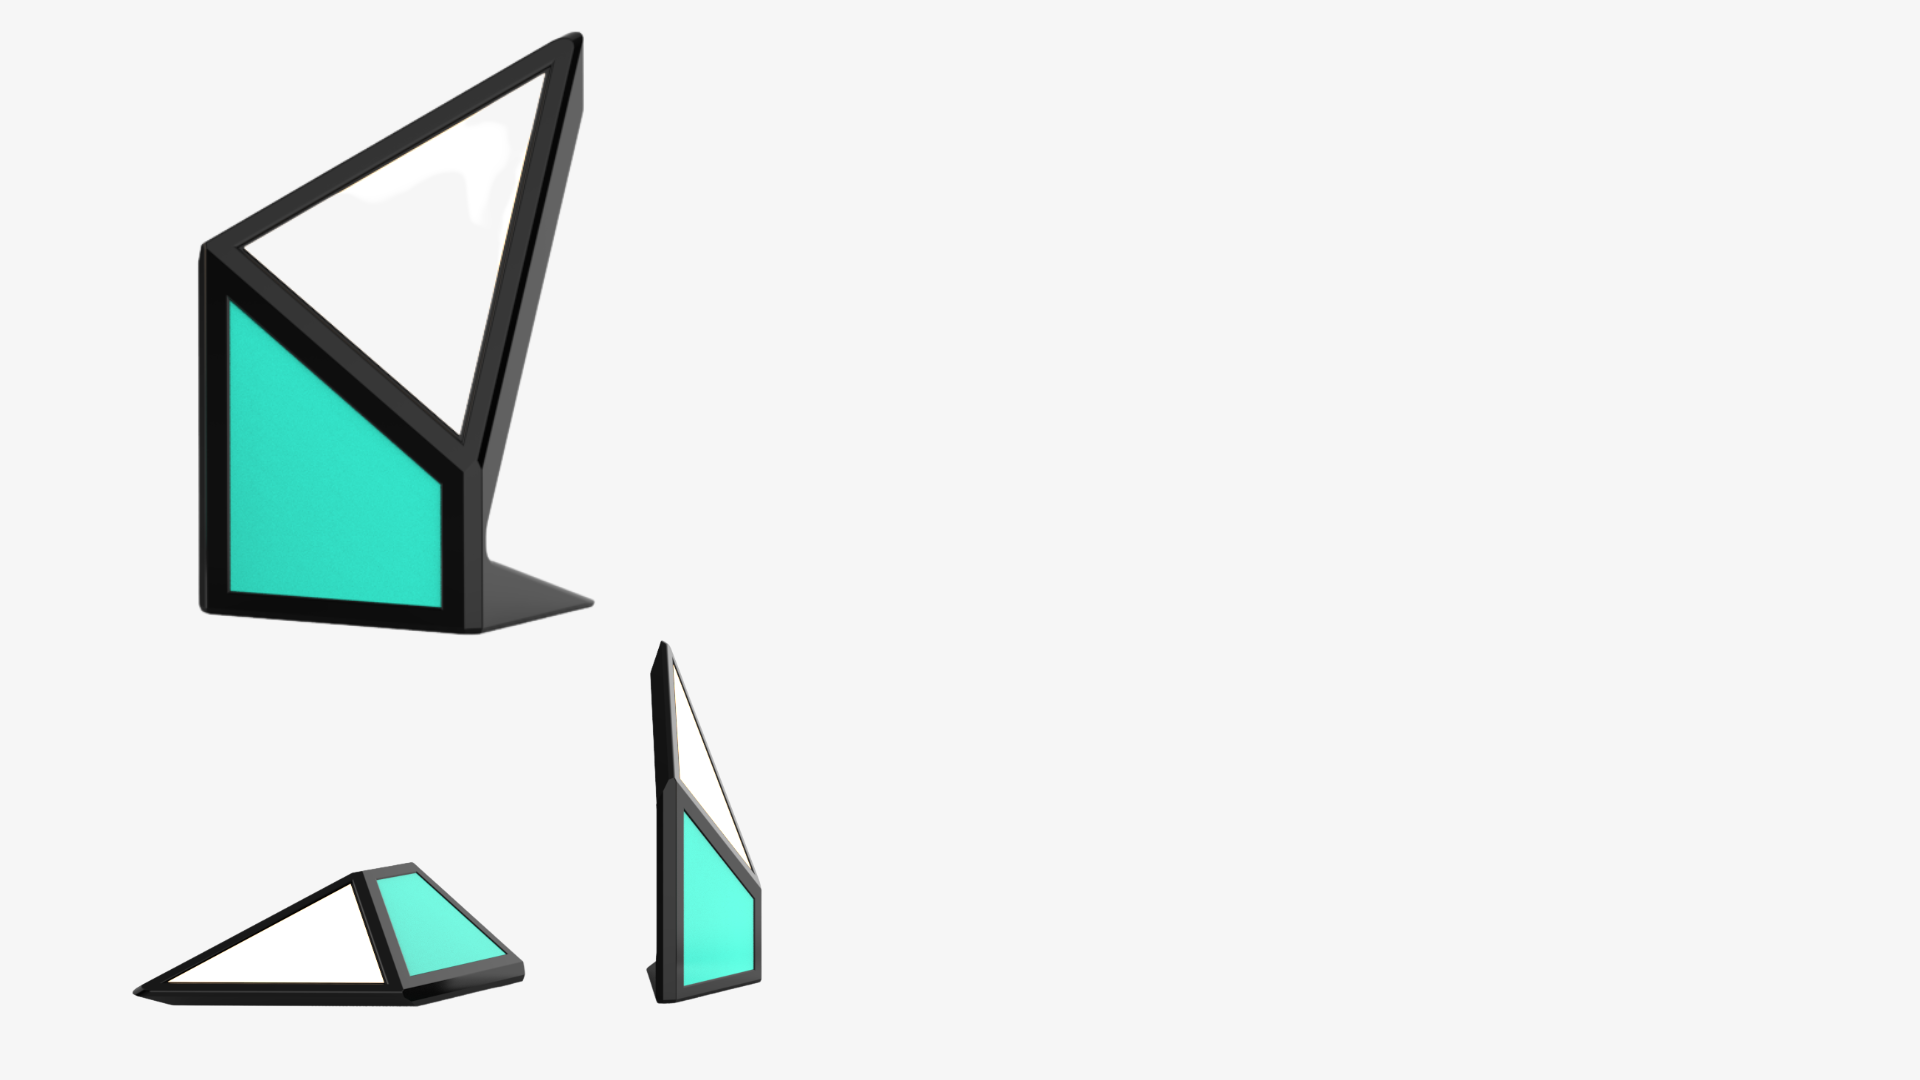
3D SKETCHES
As the project progresses, we move into the 3D realm. The most viable concepts are mocked up in CAD so we can review them from multiple angles. Visuals are refined, space made for electronic components, and OEM parts selected. We begin building out any user experience details and selecting colors and patterns.
DESIGN FINALIZATION
When we and the clients agree that the design is visually finished, we create fully detailed CAD models. These can be rendered in 2D for review and promotional purposes, as well as 3D printed for a final design check. In this case, the client had an established supply chain and their production partner took care of prototypes. Sometimes we do them in house or work with a local prototyper.
Design for production
When the design is complete and approved by both us and the client it’s time for production. We create a spec pack that includes: an overview ‘cheat sheet’, a detailed CAD model, a bill of materials, color codes, and anything else necessary to communicate the design to the manufacturing partner. For this lamp, most of the electronic components were available as OEM -original equipment manufacturer- and did not need to be made custom. This is a great option for many products and saves a lot of production cost, but some more cutting-edge items need custom componentry.


Production models and testing
After sending the detailed specifications to a factory, we coordinate with them to sort out any issues. Often some elements can be modified to streamline the production process or lower the per unit cost, and we work with the factory engineers to make sure the product is being made as efficiently as possible. The factory then sends us a production model - a prototype that looks and works exactly like the final product. We review the production model for any discrepancies and send along feedback. It’s rare we need more than two rounds to hit approval, but complex products occasionally take more.

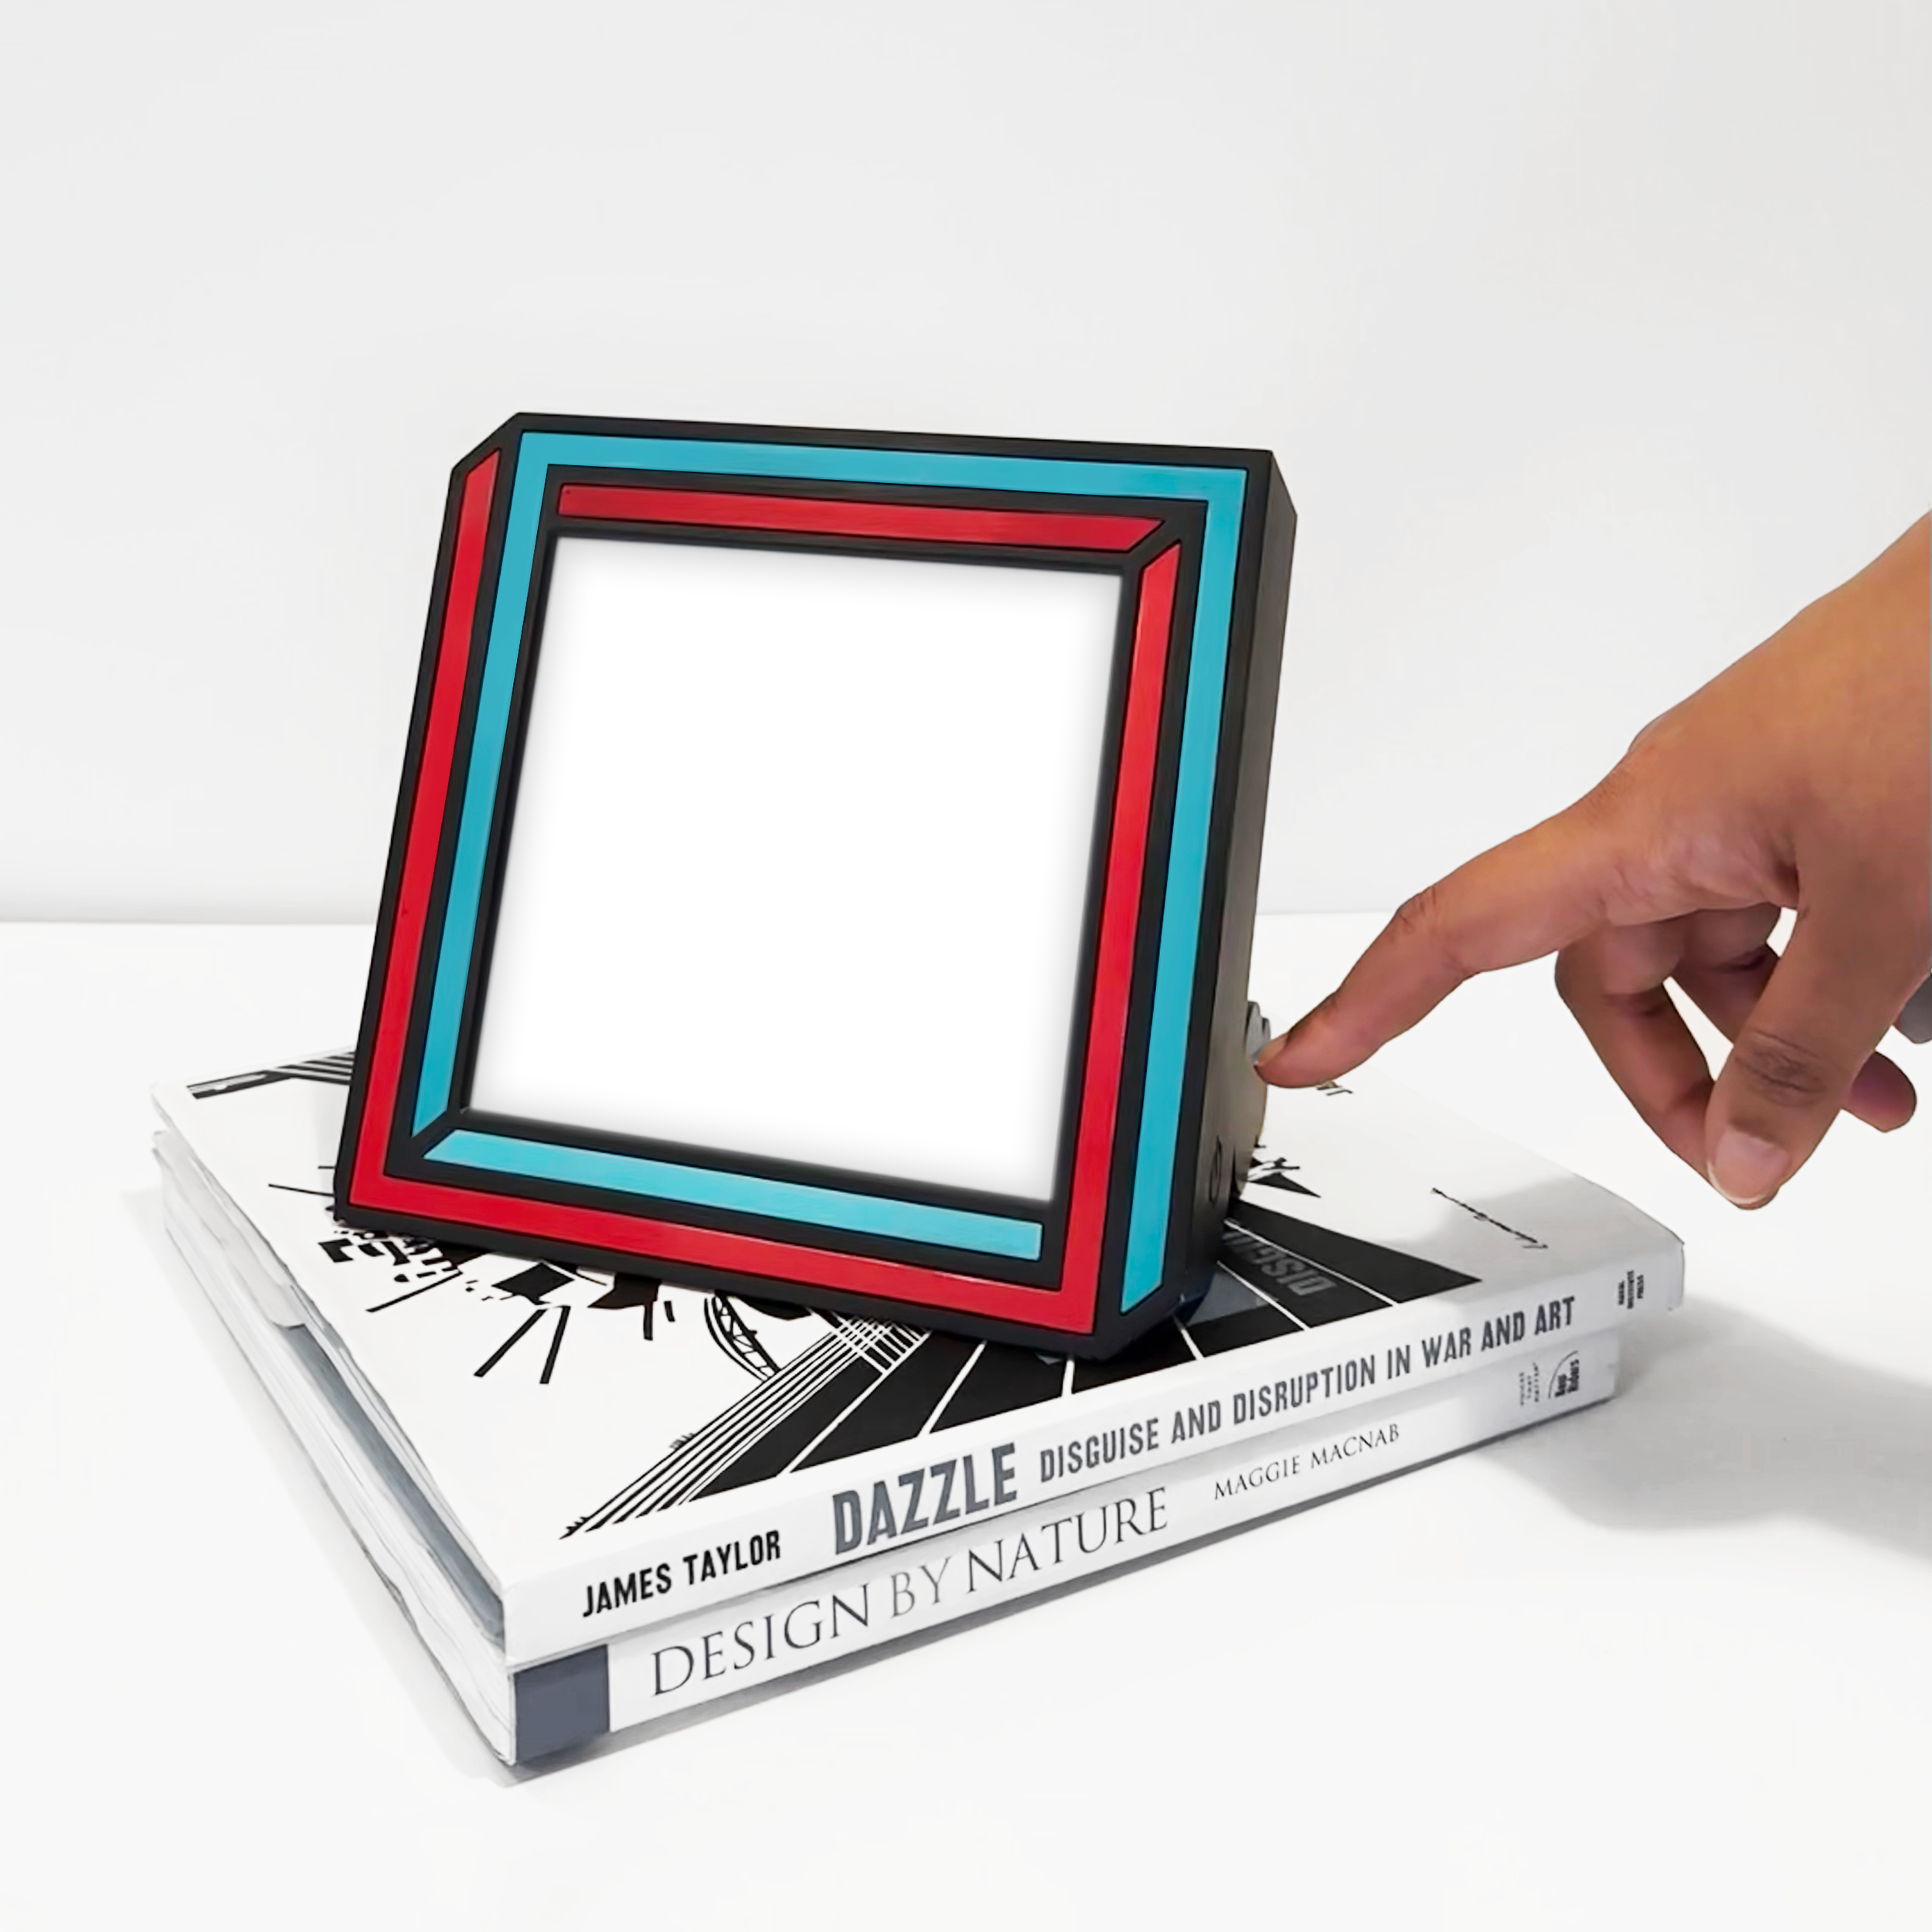
Final product
Once the production model is approved, a tool is cut and production begins! We make sure the client has all the resources they need to work with the supplier and then our work is done. Of course, we are always available for support. We love watching our client’s products enter the market and try to keep track of all of them.